

Backyard Poultry
Backyard poultry offer many benefits including fresh eggs at home and free fertiliser. Hens scratch and offer a ‘no dig’ solution for freshly preparing your garden. How many hens you acquire will depend on you and your council requirements.
In the last couple of centuries, mainly in Europe but later in America and even later in Australia, chickens were selected and bred for their produce, until today we have breeds of the domestic fowl which are specialised for certain functions. There are breeds which lay eggs well, the record being in excess of 360 eggs in 365 days, breeds which grow quickly for meat, small birds bred for looks, and birds bred for the sheer pleasure of it. We even have an Australian breed, the Australorp.
Setting up for backyard hens is the first step to providing a suitable home free from pests and predators. The hens will need non-spill feeders and reliable drinkers. A rollaway nest box will ensure clean and easy to collect eggs. Check out suggestions below.
A short background to the origin of the domestic fowl will help us to understand the proper management of these birds.
The domestic fowl has its origin as a wild forest bird in the Asian forests. As forest floor birds, they live on shoots, small seeds, insects, worms and other small animals. For this reason, God gave them feet with strong sharp claws for scratching, a sharp beak and a neck with a strong pecking action. These birds are very social creatures, living in flocks with a dominate male as the head. Their wings are not really for flying, but help with running speed if the situation demands it. They sleep in trees at night.
The fowls spend most of the day searching for food and the rest of the day is spent preening and dust-bathing. Preening is the fowl’s way of cleaning their feathers. Oil from an oil gland at the base of the tail is spread through the feathers by the beak. Dust-bathing has an important role to play in the health of the bird, although it is thought to help in controlling parasites.
The bird digests its food by first crushing it in an organ called the gizzard. The bird has no teeth, it uses the gizzard to perform this function. This is a muscular sack full of pieces of grit which grinds the food on the way to the stomach. Even ground pieces of glass are sometimes found in the gizzard as part of the grinding material in backyard poultry. The digestive system is not primarily designed for modern high energy rations, but a diet predominantly of live animals, insects, some grains and sprouted seeds. These birds, in the wild, would lay about 20 or 30 eggs per year going broody several times to hatch them. So much for our wild bird.
The modern domestic fowl is still basically a forest bird at heart and still retains most of the same instinctive habits of their forest forebears.
When we keep fowls in the backyard situation, it is helpful if we can provide an environment which is as close as possible to the original habitat of the fowl and allows the fowl’s instinctive habits to be catered for. This means that we will, if possible and practical, provide our birds with the following facilities;
- An environment similar to the forest floor.
- A diet of whole seeds, fresh shoots and insects, worms and the like.
- A shady place to preen in comfort, and a dusty place to dustbathe.
- A warm dark place for the task of laying eggs.
- A perch for roosting at night.
These conditions are ideal and may not be possible in the backyard situation. However, I believe that these conditions are closely approximated in the free range situation and a close second is the deep litter fowl house for those with insufficient space to free range fowls.
One of the most common myths which I hear is that chickens live wonderfully on grass and a bit of grain. They will find all else they need in scratching in the yard. I encourage people to think carefully about what the deep forest is like. Insects and wild life abound, but grasses and grain are much rarer. The grasses of the jungle are usually green sprouts of seeds, which have fallen from the overhead canopy, reaching up for some glimmer of sunlight, soft and low fibre but loaded with B group vitamins. The grasses of Aussie pastures are usually long and mostly fibre. Anything longer than a few centimetres in length contributes little but fibre to the diet. However the green still triggers a strong instinct to seek green shoots. Likewise, the seeds in the jungle are not from rice paddies and wheat fields with abundant grains year round, but maybe scarce, and are seasonal from the forest canopy. Because seeds are less abundant in the jungle, there is a strong instinct for the bird to eat seed they can find. However examine the bird beak and you will see it is intended for eating small live animal and insects. This helps us know what to feed our birds.
Poultry Houses – Their Layout, Location and Operation
Purchasing or building a poultry house is the first operation in successful poultry keeping. The design, location and operation of your poultry yard will greatly influence health, and therefore the production from your enterprise.
Firstly, check with your local council to ensure that your operation will conform with local by-laws. This may influence the type of poultry house you buy or build. Usual regulations deal with distances from boundaries, distance from dwellings, vermin proofing and the amount of area used.
Secondly look for the alternative sites that the house may be located on. The ideal site has several features:
Northern aspect. This means that the shed should preferably face the north. With good shed design this will mean that the summer sun has no access to the inside of the shed but the winter sun has full access, so the inside of the shed is cooler in summer and warmer in winter. The litter will also stay drier in the winter. Other directions may be necessary if prevailing weather patterns produce high winds from the north especially when those winds carry a lot of rain. Many older books recommend east facing sheds but these may need shade or blinds in summer.
Afternoon shade in the summer. This usually means trees on the west to south western side of the shed (Victorian locations). Some eastern shade may also be desirable. If possible a windbreak on the side of the winter cold winds is helpful also. Shed design in most of Australia is more concerned with the worst case conditions in summer rather than the winter. If the shed temperature is less than ideal in winter, then the birds will usually just eat more and produce less, assuming that the birds are not exposed to high winds.
Well drained soils in the runs. This is important as wet soggy runs have bad long term effects on the birds. If the roof water is not collected by gutter, make sure that the water is diverted away from the run area.
The runs should be as large as possible. I recommend a minimum run size of 36 sq. metres (400 sq. ft) of run space per bird if the birds are to have continuous access to the run. Even with this area, the run can be a little ragged. If less space is available then limit the time the birds have access to the run.
Shed Operation on small scale poultry keeping
The best type of shed operation for the small hobbyist is a deep litter house. This is where the shed floor is covered with thick layer of absorbent material such as wood shavings. These are usually available cheaply and if not overstocked require changing only every six months to yearly. The shavings develop a beneficial bacterial action with the droppings, resulting in the locking up of the ammonia from the droppings into the shavings. This means that the litter has almost no smell as long as it stays dry. Rice hulls and shredded newspaper are two other alternatives to the shavings, but we have found that straw and hay are not as good as they are not as absorbent and so tend to smell more.
If odour is a problem because litter is difficult to obtain, or when keeping ducks, then digestive enzymes may assist with odour reduction. This deep litter shed is usually sufficient size to keep the birds in all the time and the run is then able to be rested if so required. The birds can also be left locked in during absences from them. The poultry house should allow about .4 sq metres (4 sq ft (although now tending up to 5 sq ft)) of space per bird.
When designing a shed remember that open space is more important than closed area in the majority of Australia’s climates. Open area can be closed in winter by doors and flaps, but if the shed is designed without adequate ventilation, it is difficult to add it later. Sheds deeper than about 1.2 metres (4 feet) require rear ventilation as well as an open front. Eave overhangs should allow adequate weather protection as well as summer shade and winter sun access.
The shed fittings should include clean continuous water supply, food supply hopper, and nesting facilities. Perches can be added as required best at a high point away from nests, feeders and drinkers.
Nest issues
Why doesn’t my chook lay in the nest?
1/ Most commonly nesting problems are related to the position of the nest regarding light. The birds instinctively like to nest in a dark place, but the darkness can be related to position of view. If I look at the nest with the light behind me, the nest looks lighter than if I am looking into the light when I look at the nest. Always see the nest from the birds eye view. So place the nest against a background light. I like to place the nest below the wire mesh on the front wall. That way the bird is looking at the light and the nest looks dark.
2/ If the nest is on the back wall, the bird has the light over its shoulder and so the nest looks light, so often the eggs will be against the front wall below the mesh. If the nest is on the side wall, often the eggs end up behind the nest, again it’s a dark spot, double shaded.
3/ Young pullets are often influenced by access and the appearance of other eggs in the nest. Placing ceramic or plastic nest eggs help overcome any negative in the appearance of the nest.
4/ Sometimes there is not enough nests, one nest box to 5 birds is good, a waiting bird can easily get into the habit of ‘drop it’ anywhere.
What is the best nest material?
1/ Nest material can be straw, hat, rice hulls, wood shavings, pine needles, virtually any material, but the material is less important than the habits (Note: rollaway nests don’t use litter)
2/ Habits are important, as once the birds develops a bad habit, namely sleeping in the nest, then the material in the nest must absorb the night manure(40% of the total droppings), and if this is the case dirty eggs are often a problem, and nest cleaning a regular chore. Shavings works better in this circumstance (highest absorbency per volume).
3/ So close up the nests before the onset of lay, make sure the birds all perch and have the habit of perching (train them if necessary) (go in after dark and place any non-perching birds up on the perches) make sure the perch is higher than the nest, then give the birds access to the nests. The birds should have enough time to explore the nests prior to starting to lay, so access from, about 18 weeks is good as long as they are not showing any tendency to sleep in the nests.
My hens are eating the eggs!
1/ Hens sometimes trample and eat the egg in the nest. Once there is habit of egg eating, it can be quite difficult to deter the hens from eating them. Crows or rats are sometimes responsible for eggs disappearing or being eaten also. A helpful solution is the rollaway nest. Once the hen stands up from the nesting position, the rolls away on a gentle gradient into a catchment compartment that is not accessible. Usually the compartment requires a flap to be opened to obtain the egg.
In summary, perches higher than the nest, nest in apparently darkest spot, nest access after perching habit established, but before onset of lay, nest egg helps. There are different nest options available.
See various nests here and ceramic eggs here
Drinkers for the Backyard
Designing a system to suit your particular needs can be a challenge. After all there are literally dozens of different parts and systems out there. Here are some different options for reliable water to your birds. Remember the golden rule of drinkers “Break the rules and sooner or later it will bite you”. Sounds a bit like life in general, you might get away with a bent rule for a while but then it bites.
So what are the rules of drinkers:
1/ Always obey the manufacturers specifications, mainly in water pressure.
2/ Keep drinker lines as straight as possible.
3/ Keep drinker lines as level as possible, perhaps with a slight downward angle from beginning to end of the line.
4/ Keep drinkers as high as possible away from floors particularly litter floors.
5/ Always use clean water. A little Chloramine T (Nycex) in the water will keep it sparkling and pure.
6/ Water use. Layer birds will consume .25 to.35 litres of water per day per hen.
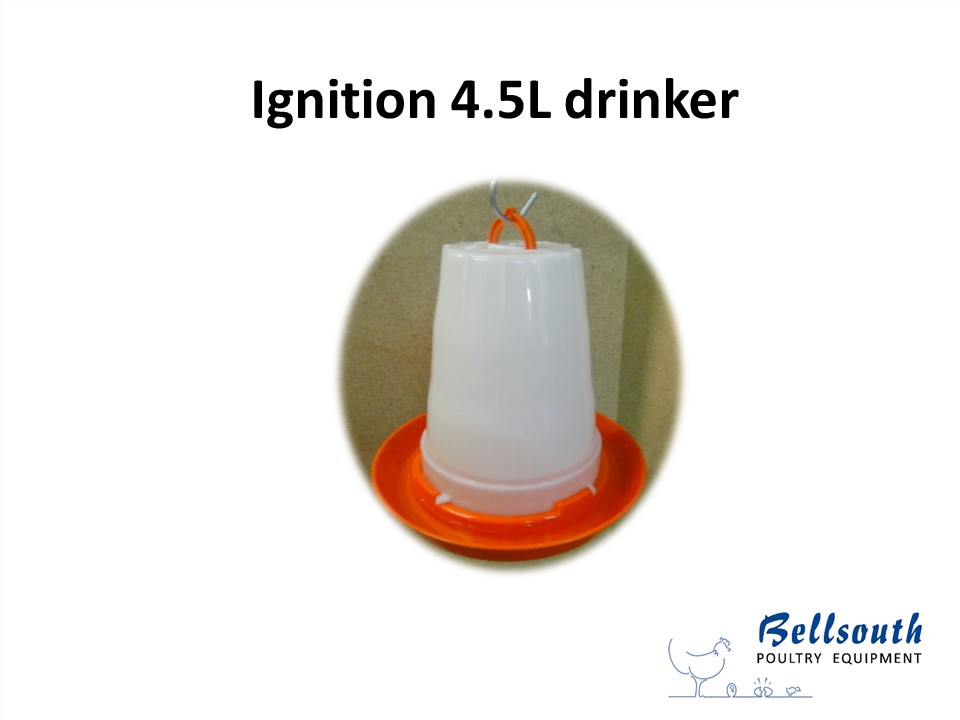
The Ignition chook drinkers are a quality, economic alternative to the cheap green and white drinkers. Not all manual drinkers are the same. The orange and white Ignition drinker is made of UV stabilised, rigid semitransparent plastic that will not go brittle. Hanger rope and accessories not included. The flat top allows easy filling and the trough is easy to put on, once 4.5 litre bucket is filled with water. Suitable for 10-20 hens for access but please consider quantity. As a rule of thumb 5 grown chooks will drink roughly a litre a day, more on hot days. Dimensions 29cm x 30cm.
 red Lubing cup drinker
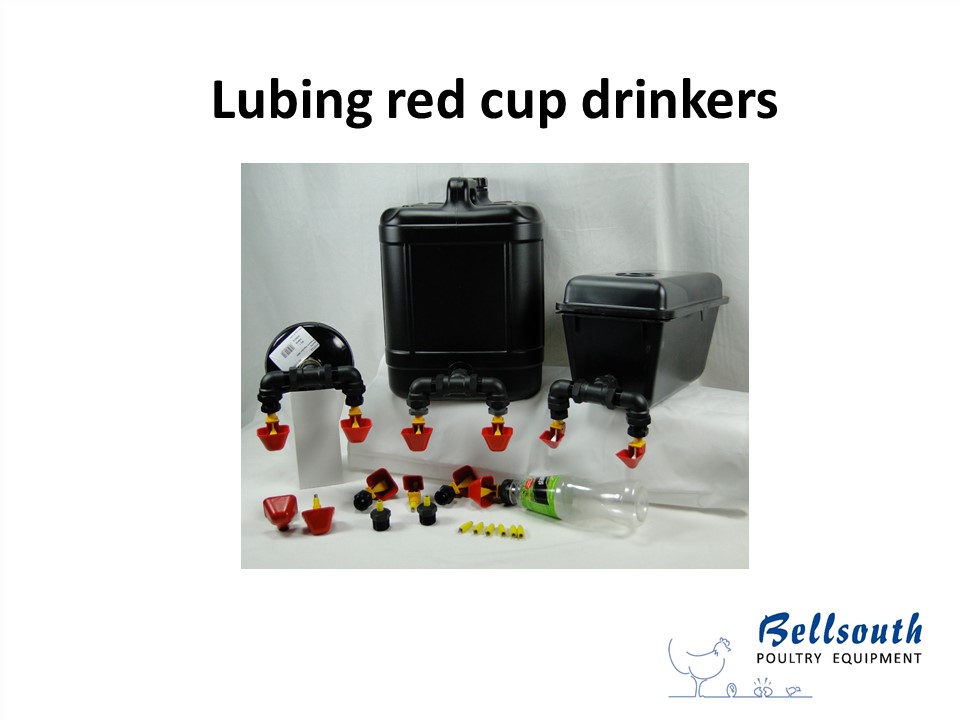
4007 and 4009 red Lubing cup drinkers are suitable for use with most species of birds, with the exception of ducks. The cups are ideal where the small amount of drip from straight nipples may cause wet litter.
Drinker drum
10, 15 and 20 litre drums are cheaply available often as a recycled item. Ensure the drum is clean and has no residues from its previous use. Check the drum has a threaded bung hole on the side. This has the right thread to match all the fittings listed. You may need to drill out the plastic at the back of the threaded hole. Then add the required fittings , and stand at a suitable height. The lip of the cup should be between back and eye height of the bird.
Examples below of how red Lubing drinker cups can be configured.
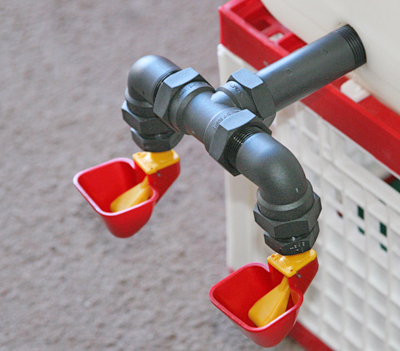
4007 red cup drinkers
The 4007 and 4009 red Lubing cup drinkers are small and fill up to 1/3 of the cup for good reason. The cups have very little water to reduce evaporation in the warmer months. The size of the cup is small and there is less opportunity for the hen to scratch debris into the water. Ideally, keep the drinker between beak and back height.
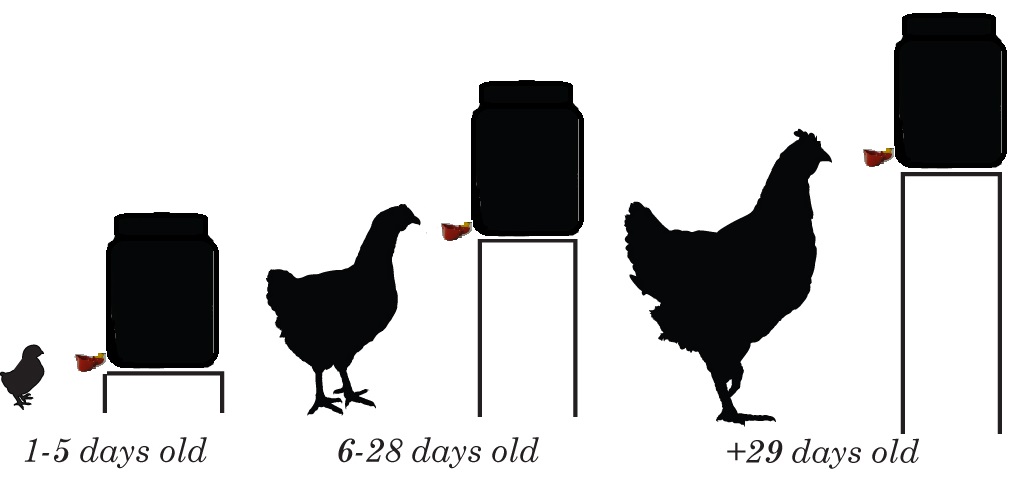
Drinker Height
If the water is clean, very few problems should occur. However if the nipple does get blocked or leak, it is almost always dirt in the nipple. The silver valve can be removed from the nipple, and the inner valve stem removed.
Do not lose the valve parts! Wash in water and reassemble.
4007 red Lubing cup drinker is suitable for use with up to 15 day old birds, up to 5 weeks. The number of birds per cup should then be reduced as the birds grow. The 4007 has a yellow tongue float that refills the red cup drinker as the hens drink.
4009 red Lubing cup drinker is suitable for growing birds from 5 weeks onwards, with 6-8 birds per cup through to adult birds at 3-4 birds per cup. The white trigger needs to be pecked to release water into the red cup.
4007 and 4009 red Lubing cup drinkers are low pressure drinkers and handle a maximum water pressure of 300mm (height of water above drinker or head of pressure).
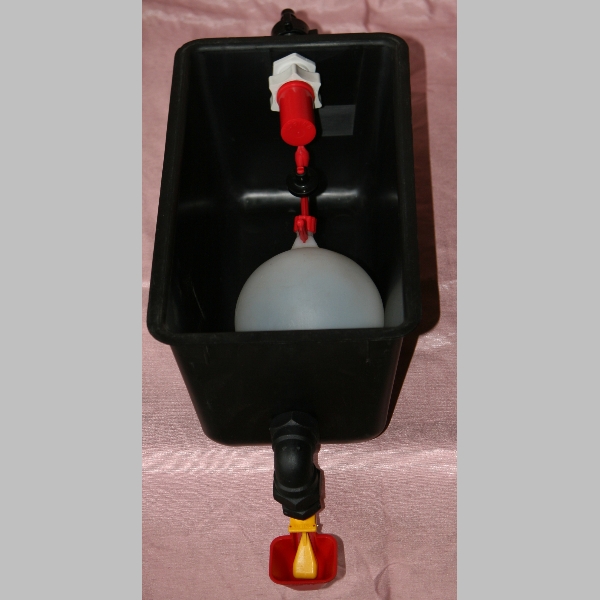 Lubing tank
The LU4201 tank can offset water pressure.
4001A Trigger cup drinkers for adult hens and 4001I Trigger cup drinkers for younger birds. Much like the old Hart cup, automatic drinker cups require slightly more pressure to operate than nipples do (at least 400mm of water pressure or head), but can also tolerate higher pressures of water, (about 2.5 metres) pressure or head. Screwed into adaptors which are glued into 19-20mm round pipe, these drinkers use a tongue or trigger, pin and seal to control water coming into the cup. Reasonable amounts of water come into the cup when triggered allowing other birds to learn and use the trigger. Birds adapt and learn how to use these drinkers promptly. Cup comes with seal but not the pipe adaptor/s.
Nipple Drinkers
Nipple drinkers can be used in most poultry water applications, from day old through to adults. The disadvantage of nipples with no cup or splash tray is that there can be some drips of water which end up in the litter. Damp litter is to be avoided with poultry.
For efficient use of the nipples, the height of the nipple is most important. The nipples should be suspended at the height where the chicks are stretching to reach the water. The birds should almost be jumping up to the nipples. If the nipple is low the bird will approach the nipple from the side and most water will bypass the bird’s beak.
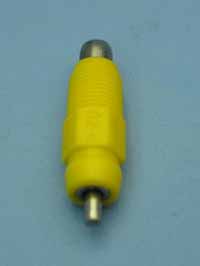 4025 nipple
The nipple drinker is available in several forms:
4025- Yellow nipple for adult layers, 2 birds per nipple, high flow rate, stainless liner, captive valve
4024 – Yellow nipple for chicks and growers, medium flow rate with 360 degrees side activation non-captive valve. Ideal for chicks, up to 15 day old chicks.
4022- similar to 4024, but all stainless steel including the capsule, with a non-captive valve. Ideal for up to 1 5 chicks per nipple, also suitable for guinea – pigs and rabbits.
4050 – High flow rate for ducks.
The use of the nipple without a cup is only suitable where a small amount of drip and splash can be tolerated. The 4025 has a captive valve and can be used in open top containers.
LUBING CUP DRINKERS
Quality German Lubing cups and nipples have been the standard in the poultry industry for many years. Do not settle for inferior copies.
The Lubing cups are used in many poultry farms. They provide a clean effective way to provide water for small groups of poultry. They are suitable for chickens, adult quail, pheasant, partridge, guinea fowl, pigeons. However they are not suited to waterfowl.
Two different cups are used.
The 4007 cup is a combi cup and has a floater which provides a small amount (about 3mm depth) of water in the cup. This is excellent as an attraction to the poultry as they can smell the water in the cup. The cups are not intended to be full. Ideal for chicks right through to adult birds.
The 4009 cup is a trigger cup which relies on the birds pressing the trigger to get water. The cups will often dry right out with no water left in the cup. These cups have a higher flow rate than the 4007 and may be better for adult birds in hot climates. They also have better access for birds with larger combs.
Why should I use a cup instead of a nipple?
Nipples are used extensively with poultry but have the unfortunate side effect that they allow about 20% of the water to fall onto the ground under the nipple. If they are used in standard deep litter houses the area under the nipple will become wet. This is unhealthy for the birds and so is not recommended. In commercial poultry they are used with a tray to catch the drips, not so easy to use in hobby facilities. If the nipples are to be used outdoors, then they can be moved often and the wet spot is of less significance.
Allow .35 to.45 litres of water per bird per day using nipples.
Waterfowl.
Nipples are used extensively with waterfowl and are an excellent item, providing continuos clean water. When placed high above the bird, the waterfowl will play with the nipples and allow water to flow over the eyes, which is excellent. However our advice with waterfowl is; Ensure the nipples are over a drain, and connected to a continuous water source as the waterfowl are notorious for high water use. Running out of water with waterfowl is not good.
Nipples can be connected in any of the systems shown for cup drinkers.
Nipples and cups are designed to operate from very low water pressures. The maximum height of the top of the nipple or cup tp the top of the water source is 300mm ( called the water head). So a cup can be used in any water container as long as the top of the container is no more than 300mm above the cup. If the water is higher than this the cup float action does not work properly and the nipples wear out faster, and have a high tendency to leak.
The mounting holes for LUBING nipples and cups must be the correct size and the holes must be round or they will not seal. The right size is 9mm.
STARTING THE BIRDS OFF ON CUPS AND NIPPLES
If you birds have never used cups before, then the first time the birds use the cups, place your finger on the trigger or floater until the cup is full. Get one bird and dip the beak in the water. Then release the bird.
With nipples simply bump the nipple with the birds beak and allow the birds to find the water when thirsty.
HEIGHT OF CUPS AND NIPPLES
Nipples should be high enough so the bird needs to extend its neck to get to the water. This minimises losses from splash.
Cup lip should be between back and eye height of the birds. Start low and lift the height of the cup lip as the birds grow.
1/ USING A SOFT DRINK BOTTLE FOR CHICKS OR ADULTS
This is ideal in a brooder with 15 day old chicks per cup, or in a cage with one or two birds. Excellent method of recycling old bottles. Follow the link to “Making a Bottle drinker”. Use any substantial container with thick enough base to allow a good thread to hold the cup. Uses 4007 cup for chicks and all poultry, with an option of the 4009 cup for large comb birds, or a 4025 nipple if wet litter is not a consideration. Also can be used with rabbits. Click here for Nipple and Cup Installation Data Sheet
2/ USING A DRUM. DRINKER CUP KITS INCLUDE ALL PARTS NEEDED.
Tip
White drums are great as you can see how much water is still in the drum. But they do grow green stuff over time. A little Chloramine T (Nycex) in the water will keep it sparking and control the green stuff. Click here.
Drinkers Water Pressure_print version
Drinkers – Water Pressure
The other day I whilst setting up a trial for one of the many drinker systems we try out before selling, some make it some do not! Having set up the system, (it’s a nipple system with its own pressure regulator) hung it up and connected it all up….I turned on the tap.
Water spurted out of the breathers…”this ain’t meant to happen”. So I think the manufacturer has sold us a lemon. Before saying such to the manufacturer, “Perhaps the water pump isn’t supplying consistent pressure to the system and if I connect it to a town supply with consistent pressure then all will be well”, so I connected it to a town supply.
Water spurted out with considerably more vigour, even hitting the roof. “This is not good”, I think.
On reflection…..
Actually this is not good at all, the nipple systems regulator like many, is built to work around the 300 Kilo pascal range, or about 30 metres of head. The regulator pulls 30 metres down to what we want for nipples, about 30cm head, so it has enough work to do with 30m of water weight bearing down on it, let alone what my pump is doing, and again what my house water pressure is, my guess –the house pressure at my place is probably about 600 kilopascal – that’s 61 metres head – that’s good for firefighting!
The sort of pressure my house pressure is and the pump pressure is also too high, is bad for washing machines, toilet cistern and explains how two of our toilets cisterns are always running. Also bad for farm auto float systems for cows, dogs, and horses …i.e. the Stock brands drinker we sell, the Methven regulator, the Lubing regulator etc.
So for automated drinker systems, the drinker system is one thing , it’s not everything, your environment matters, so take a look, or get a plumber to check the water pressure of your house, for your appliances and plumbing’s sake, and the water pressure supplied by your tanks or pumps on farm or in the backyard.
For automated drinkers, including float tank systems, you want a supply pressure no more than 300 kilopascals, preferably about between 200 and 280 kilopascals, or between 20 and 28 metres of head. This is supply pressure to the regulator or float, this is not the pressure for nipples or cups or bell drinkers that’s a whole other story….
To regulate supply pressure…
- Adjust the pump or
- Add a pressure regulator for the whole backyard after the pump or
- Add a pressure regulator for the whole house and backyard, after the incoming water from the street or
- Add a set pressure regulator just for the line running the drinkers, this idea is cheapest and this sorts out the drinkers on that line, but what about your washing machine and other appliances?
Water pressure affects more than just automatic poultry drinkers. The automatic poultry drinker pressure problem, had a silver lining, I got to fix up a water pressure problem in my house. I got a set pressure regulator at 250 kilopascals that sorted out the nipple system under test, the house, that’s a bigger story and still not done, I will put in a regulator myself, or more likely my wife will get annoyed and call a plumber.
Here is a link to the Poultry CRC YouTube (external website) on where eggs come from. You may choose to buy store bought eggs or have your own.
Tips on Plucking_print version
Tips on Plucking
Often plucking is regarded as a simple process, and if our birds are always the same age, weight, and breed then it’s easy. But for the hobbyist, it’s often not so easy. These notes are intended to assist in the development of the skills needed, without I hope, making it sound too complicated. It really is straight forward but a few principles always makes it easier.
There are four stages to good plucking.
1.) Select the bird at the right age.
2.) Scald the bird correctly
3.) Pluck the right way.
4.) Treat the bird right after plucking.
1.) Selecting the bird at the right age is important. The birds develop several sets of feathers as they grow. The early stage of these feathers as they just emerge is called pin feather stage. Plucking birds with pin feathers is always much more difficult, so I recommend selecting the birds after pin feathers have unfurled. So check the birds and if they have pin feathers wait another week and usually they are unfurled and will pluck without lots of manual clean up afterwards.
Very old birds and very young birds often have skin which is thinner and less resilient to the plucking process, which is more prone to tearing. These birds need more careful scalding and attention during plucking to avoid skin tears.
2.) Scalding is the process of dipping the birds in hot water to cause the release of feathers, the combination of time and temperature are important.
The difference methods are called hard scald and soft scald.
If the birds are for immediate consumption, then hard scalding at higher temperatures and for short times is acceptable. This is usually done at 60 degrees for just enough time for the leg feathers to come off when rubbed with the thumb. This combination can cause some blotchiness of the skin, not so pretty with roasting birds and also the high temperatures tend to reduce shelf life.
Soft scalds is usually at 45-50 degrees and is less likely to damage the skin but takes longer to reach the point where the feather release under a little rub with the thumb. If you want to fridge them for a week then better to soft scald.
Record the time and temperature for each combination of breed and age you use so that it is easy to repeat next time.
3.) Plucking. Good plucking is a combination of the right number of birds, the right time of plucking and the right removal of feathers.
The bird in the plucker should tumble in such a way that it is tumbling end over end but sideways at the same time, a sort of rotating diagonal tumble. This means all sides of the bird pluck evenly. If you have too many birds in the plucker they cease to rotate correctly and slide around plucking one side and leaving the rest poorly plucked. Add extra birds with each plucking batch and when they cease to rotate you can make a note, to only pluck one or two less of that breed, age and weight combination.
You may need to remove wing flight and tail feathers before plucking, usually it’s possible to pull them one handful for the tail and one handful each wing.
Plucking time is an observation, and will vary according to the type of bird and feather cover. Over plucking, can damage the skin.
Feather removal is by cold water spray. Use a trigger gun on a hose, and as soon as the feathers build up in the machine, usually about 20 seconds into plucking, flush with a good flow of water so the feathers all wash out the side. This allows better plucking and a cleaner finish. It also starts to chill the bird.
4.) Chill the bird in cold or iced water as quickly as possible. This will give better carcass life and nicer presentation. Eviscerate the birds after initial chill and refrigerate as quickly as possible.