
Brooder Methods
So, you have your own chicks fresh from the incubator or bought your own brood! Its an exciting and stressful time of chick growth. The following fact sheets will point you in the right direction – read on!
When brooding chicks, ensure the shed is enclosed with insulation, and has a room temperature about 15 degrees Celcius or warmer with no draught. If the shed is open, and in a very cold area, a larger element (higher wattage) should be selected. You will require a box or surround to keep the chicks together. A round surround ensures there is constant movement rather than gathering or potentially crushing in a corner.
When brooding chicks, ensure the shed is enclosed with insulation, and has a room temperature about 15 degrees with no draught. If the shed is open, and in a very cold area, a larger element (higher wattage) should be selected. You will require a box or surround to keep the chicks together. A round surround ensures there is constant movement rather than gathering or potentially crushing in a corner.
If you are brooding small numbers, a large cardboard box is adequate, and has the advantage that it can be easily disposed of after brooding is finished. A strip of sheet metal also will make a good round surround as the size can be varied as the chicks grow. As a rule of thumb, a 1.5 metre diameter circle will be adequate to start 100 chicken chicks at 2-3 weeks of age. The circle could be closed up to 1 metre at day old and expanded as the chicks grow. Wood shavings or rice hulls make suitable coverings for the floor.
Adequate feed and water is essential, and feeders and waterers should be selected for the number and type of chicks brooded. Hang the brooder assembly from the roof (or from a stable tripod) at the starting height recommended in the about 30cm from back of chick. Turn on the brooder at least 1 hour before placing the chicks in the brooder area. A trick, I use is, to keep my hand warm in my pocket for a few minutes, then place it on the floor immediately under the centre of the brooder. You should feel a mild warmth on the back of your hand which equates roughly to 35 degrees radiant heat temperature on the chicks.
Let the chicks settle for an hour or so and then check to see how they are settling. The chicks should look comfortable and be evenly distributed across the brooder area.
If the chicks huddle together then lower the lamp as the chicks are cold. If they are all round the outside of the box then raise the lamp as they are too hot. If they are all on one side of the brooder area this usually indicates a draft.
Check the chicks in the evening or early morning at the coolest times to make sure the chicks are not too cold. Raise the height of the brooder assembly as time goes on. Use the chart as a guide. If the weather becomes colder the brooder assembly may need to be lowered slightly. Raising the assembly will increase the area covered but reduce the intensity. Lowering the brooder will increase the intensity but reduce the area covered.
Remember that pheasant and quail chicks will require a little more heat than chickens.
See also
Bellsouth brooder products
Hatchabatch app Android or iTunes
See Bellsouth YouTube channel
When selecting a brooder, remember that the ambient temperature is the key to the amount of heat required. This also means that the specified number of chicks recommended for each brooder size is based on room temperature. If you select a brooder for use with 50 chicks at an ambient (room) temperature of 10o degrees Celcius and try to brood with an actual room temperature of 2o degrees Celcius then the chicks will be too cold.
Most of the brooders used in small flocks are of the radiant heat type. This means that thermometer readings can be deceptive, as thermometers only measure the air temperature. Radiant heaters only heat the objects which the radiation falls on (like the sun). This means the chicks and the litter. The air is only warmed from the birds body heat and the warm litter.
For example with a small number of chicks, say 30 and a 75 watt ceramic element brooder, the element and shade would be suspended about 30cm above the litter if the ambient temperature was about 10oC.The actual heights to set the brooder will depend on the reaction of the chicks when they have settled in the brooder area. If the chicks are huddled together under the heat, then the brooder is too cool, lower the heater. If the chicks are spread out against the surround then the brooder is too hot, raise the height. If the chicks are all on one side then there is a draught. If the chicks move freely over the whole area then the heat is about right.
See also
Bellsouth brooder products
Hatchabatch app Android or iTunes
See Bellsouth YouTube channel
Brooding methods_pdf print version
Brooding Methods
We have all heard the saying ‘A chain is only as strong as the weakest link’. This is true of the process of producing quality birds which will in turn be beneficial to the owners.
Brooding is perhaps the most difficult of the links as it tends to be filled with uncertain areas. Mistakes in breeder management usually result in lower hatch rates, and some weak chicks. Bad mistakes in incubation usually mean no results at all. Even the best chicks can be ruined in the first few weeks of their life, and though they may die they will never be much use for their managers. However the signs of ruin may be disguised and so only become apparent months later as the birds mature. A temporary halt in growth in the brooding stage is difficult to make up later.
Brooding Methods
There are about a dozen different systems used for brooding chicks of all species. There are only two methods of brooding and all the different systems and techniques fall into these two methods.
Method 1
The first method is hot air brooding. This is where the heat source heats the air in the brooder area to a temperature which is comfortable for the chicks. This method usually involves adjusting the air temperature every few days, gradually reducing the temperature as the chicks develop and are able to handle the lower temperatures. Often, though not always, this method uses temperature regulators to accurately control the amount of heat available to the birds.
Hover brooders, battery cage brooders, hot water brooders, carbon filament lamps, hard glass brooder lamps and many gas brooders are used in this category.
This method has some advantages and some disadvantages. Perhaps the biggest advantage is that the air temperature is easily measured with a thermometer. The predominance of lamps in this category also means that the chicks are often reared in continuous light, which can be useful in that the chicks are attracted to the light and learn quickly to go to it when requiring heat. The higher light levels also mean that night time inspection is easier.
The disadvantages of the system are several. The first is that the birds use the evaporation of moisture from the lungs as an evaporative cooling system. If the air temperature is just a little too high, and the humidity also a little high, the evaporative temperature control mechanism of the chick cannot work. This means that the chick is under heat stress. This effect is worse in the first few days. So accurate temperature control is important.
Secondly if continuous light is used, it tends to upset the sleeping habits of the chick. As !he growth habit of birds is triggered by the light stimulus to the eye, which stimulates the production of various hormones, continuous light can produce negative symptoms, including hyperactivity, cannibalism, and early sexual maturity. The effect of continuous light is most marked in the less domesticated species such as pheasants. The less domesticated the species, the more susceptible they are to over stimulus.
The third disadvantage is that the birds grow feathers more slowly. The feathering rate is determined by diet, genetic factors, and air temperature. The air temperature is the factor of importance here. If the air temperature is close to the body temperature of the bird, heat losses are minimal, and the bird needs less feathers to stay warm. The production of feathers is slower when the air temperature is higher and increases when the air temperature is lower.
Method 2
Radiant heating is the second method used for brooding. This involves the use of heaters which heat the objects they are aimed at without heating the air.
This sounds a little odd at first but if you think of the domestic bar radiator you will see the principle. If you turn on the radiator and measure the room air temperature you will find the room temperature only slowly rises. If you sit in front of the radiator you will soon feel very warm, though a quick check of the air temperature will show that the room temperature has barely moved. As the walls warm up they do heat the air a little but that is another story.
This type of brooder also has advantages and disadvantages. The usual heat source for these is ceramic heaters and radiant gas heaters.
The advantages are lower light stimulus, and lower air temperature. The lower air temperature has two effects. The first as we have seen is the faster rate of feather growth. The second is slower disease transmission. If the air temperature is low then many disease organisms travel more slowly and cannot multiply outside the bird’s body. This can be taken to extremes where the disease resistance of the bird can be lowered due to cold stress. Because most of these type brooders have low light they do not disrupt the bird’s growth pattern. They simulate the process used by the mother hen. If you observe the young chicks under a mother hen, you will see them walking around in the cold, then cuddling under the warmth, but often with the head out in the cold air. As well as this the mother does not have any lights so when the chicks sleep it is in darkness.
Radiant Heat brooder – gas and electric 
Radiant Brooders
The disadvantage of this type of brooder is that they require a little more judgement and management for the first few days. Because there is no light from the brooder, the chicks, do not have the attraction factor which leads them to associate light and heat. They tend to quickly go to the light and so do not need to be contained as much as when no light is used.
The brooder area will need to be more controlled for radiant brooding until the chicks learn that heat is heat. However having learnt where the heat source is, the chicks then regulate their position, moving in or out from the heat source according to their heat needs. Another disadvantage appears to be emerging with this type of brooder. Because the heat is all overhead to the chicks, the chicks can tend to get hotter heads that by hot air brooding.
This can mean that in Mediterranean breeds such as Minorca and Leghorn commence comb development earlier and can develop comb weakness and overlarge combs.
Heat zones
Another aspect of brooding which can be important is the concept of temperature zones in brooding. Many think that the temperature in the brooder should be set to a specific temperature for each stage of growth. This may be correct, but the difficulty stems from our inability to correctly decide what temperature and then be sure that it is correct.
Behaviour in brooder brooding zones
The easiest way to mimic nature here is to provide three zones of temperature. A hot zone, which is a little above the optimum temperature for the chicks. This hot zone may be relatively small. A comfort zone which should be large enough to accommodate all the chicks, and set at about the optimum temperature for the stage of growth of the chicks.
Thirdly a cold zone which should be considerably cooler that the optimum temperature required by the chicks. This allows the chicks to have a greater degree of control over their environment, and so allows a happier chick.
The chicks will adjust their position in the brooder area according to their requirements. In the active awake periods the chicks have a faster metabolism, i.e. they are eating more food and converting it to energy and so require less external heat input. In the sleeping phase the metabolism slows and the external energy requirements increase.
And of course there will be the times when they just want to stretch out and sun bake and so like the hotter zone. This zone also acts as a bit of a safety barrier just in case the weather changes and cools off, allowing that bit extra heat if required.
How much heat do chicks require?
The chick has basically three different stages of heat requirement. It is important to stress here heat and temperature. The two are different things.
Heat is really the short name of Heat Energy. Heat and hot are different. Hot refers to temperature, heat refers to energy availability.
If I have some heat energy and I apply it to an object, the temperature of the object will rise. If I have a bowl of water and I put 2 units of heat into it, the temperature will rise by say 5 units. But if I tip half the water out, and then put in the same two units of heat into it, will the temperature change 5 units? No, the temperature will rise by more than 5 units. So we see that temperature is a measure of the effect of heat energy on an object.
Back to our chicks. They have three different stages of heat requirement. The first is the heat requiring period. This is where the chick has not developed its own insulation, and its digestive system is still not fully functional. At this stage the chick will draw heat energy from the environment. The chick must be kept able to accept heat from the environment as it cannot control its own losses. This stage can occur at any time in the life of the bird if the environmental temperature falls too low.
The second is the thermoneutral zone. This is where the chick has developed some insulation (feathers) and can eat enough to produce its own energy requirements, i.e. the food is converted to heat energy.
The third stage is where the chick is producing more heat that it needs and so gives heat back to the environment. This can occur at any time after the chick is hatched if the environment temperature is allowed to rise too high.
How much heat?
The key is observe the chicks. If the chicks are too cold they will huddle as close to the heat as possible, in extreme cases piling on top of one another. They will often peek pitifully and generally look uncomfortable.
If the chicks are too hot they will spread out around the edge and try to get away from the heat. They will also tend to have their wings spread and beaks open, panting to try to get rid of the heat.
If they are comfortable they will be spread over most of the brooder area, some sleeping under the hottest part, some moving around the cooler parts.
The other factor which can cause havoc in brooders is draughts. These cause an effective lowering of the brooder temperature and will cause the chicks to be uncomfortable, and can cause substantial losses and poor growth. Drafts tend to be obvious as the chicks cluster on one side of the brooder.
Practical Application
The lowest temperature that will occur in the brooder room is important to consider. Even with radiant brooders a minimum air temperature must be considered. If the air temperature is too low the amount of heat required to keep the chicks warm will be enormous. Absence of drafts is important, but there must be adequate fresh air. Watch out for heat traps where the birds have moved into a cooler comer to avoid the heat. However at times the cooler corner is still hotter than the chicks can stand. But for the chick to get out of the cooler comer to a place of true comfort means the chick must move into the hot zone. The chick will not do this but will die in the comer struggling to get away from the heat.
Roof insulation is worth considering. Even insulation will prevent condensation and frost. Frost can badly effect chicks especially in sheds with plain iron roofs.
A brooder surround is essential where hover brooders and radiant brooders are used. This is a sheet metal, cardboard or wooden circle which will be used to control the area the chicks move in and to prevent floor drafts. If battery brooders are used, consideration must be given to draft prevention at the height of the brooder.
Brooder areas are covered with three different materials. The first is shavings, or as some call it litter. The second is litter covered with paper. This is usual for small chicks such as bantams, pheasant, and quail or for very large numbers of chicks. The paper gives better footing for the first few days then breaks up and mixes with the litter.
The third method is wire floors as in battery brooders. These also are often covered with paper for the first few days. Wire floors can reduce some parasite problems, and can make brooding large numbers of chicks in a small area a possibility.
When using ceramic radiant brooders, the many different sizes should be used with a surround on litter. They are rugged, with good heat distribution in central hot zone, and outer comfort zone. The shade MUST be kept shiny on the outside to keep efficiency. Sometimes used with an attraction lamp.
Exceptions
One breed which defies the rules is with turkeys. If turkeys are being brooded with radiant methods it is a good idea to have an extra light in the brooder area for the first week. Turkeys have limited vision for the first week or so of life and so having extra light makes it a little easier for them to find the feed and water.
Feed and water
These of course are necessary items. It is better to have a little too much feeder and drinker space than is required than too little. I also recommend the use of soluble vitamins in the water of the day olds. This helps overcome any stresses which may have occurred in the transportation or settling in of the chicks to the brooder.
Ducks and geese will take up more area, and so less birds will be covered by the brooders. For larger birds such as ostrich and emu, use will be determined by individual application. The above tables are guidelines only. If the chicks are too cold lower the height, and if too hot, lift the heights. Double the height of the heat source will increase the area covered by a factor of 4 and reduce the intensity by a factor of 4.
Explanation of different types of heat
Each model which assist us to see all the factors involved in the management process. This helps us to understand the dynamics of the situation without short cutting and over simplification but without undue scientific lingo. I hope the following model helps you too. The model applies to birds of all ages.
BIRD COMFORT = TOTAL HEAT GAIN – TOTAL HEAT LOSS
BIRD COMFORT is where the bird is able to maintain its body temperature without stress, and where all body functions can occur at the optimum level. Chicks cannot maintain their own body temperature levels and so need outside assistance. Older birds actually produce more heat than is necessary and so must lose some heat to the environment perform satisfactorily.
TOTAL HEAT GAIN = CONVECTIVE HEAT +CONDUCTIVE HEAT + RADIANT HEAT + METABOLIC HEAT
CONVECTIVE HEAT GAIN from warm air and air heaters.
CONDUCTIVE HEAT GAIN from contact with warm surfaces.
RADIANT HEAT GAIN from radiating bodies which are hotter than the bird. This may also be hot roofs and walls in summer.
METBOLIC HEAT from the conversion of food to growth and activity.
TOTAL HEAT LOSS = CONVECTIVE HEAT LOSS + CONDUCTIVE HEAT LOSS+ RADIANT HEAT LOSS
+ EVAPORATIVE HEAT LOSS.
CONVECTIVE HEAT LOSS is loss to the air, by drafts, by contact, and by exposure (i.e. lifted wings in hot weather).
CONDUCTIVE LOSS is loss by contact with cooler surfaces. e.g. dust bathing.
RADIANT HEAT LOSS is loss to cooler surfaces and objects. Not greatly significant in older birds.
EVAPORATIVE HEAT LOSS is one of the main controllable losses from the fowl. In chicks evaporative losses are small but actively used. In large birds, the bird quickly puffs air in and out of the forward air sacks, is an important method of removing body heat.
See also
Bellsouth brooder products
Hatchabatch app Android or iTunes
See Bellsouth YouTube channel
Drinkers for brooders_pdf print version
Drinkers for Brooders
There are many drinkers which will suit your brooding requirements.
Nu Look drinker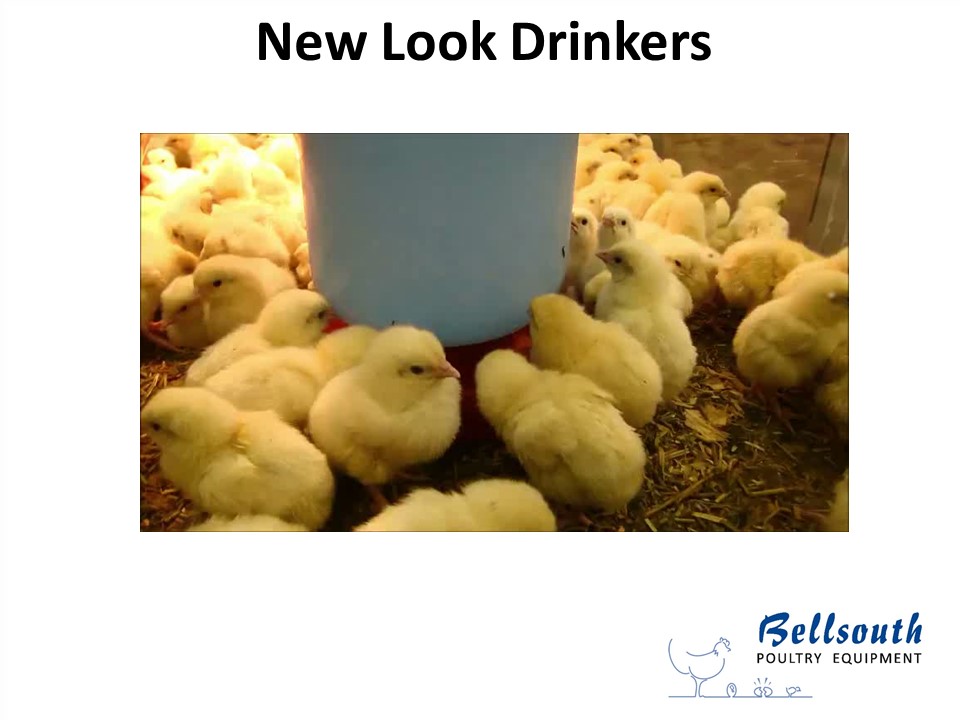 Chicks in glass brooder at Sydney Royal Easter Show
The Nu Look bottle drinker holds 4.5 litres and are ideal for starting chicks. Each bottle is suitable for up to 50 chicks from day old to one week. Often used in commercial broiler and breeder farms as a supplementary drinker alongside nipple lines. Custom made plastic mixes with high UV stabiliser.
4007 Lubing cup drinkers
The 4007 red Lubing cup drinkers are suitable for use with most species of birds, with the exception of ducks. The cups are ideal where the small amount of drip from straight nipples may cause wet litter.
The 4007 red Lubing cup drinker has a yellow float that refills the cup as the water level lowers. This red Lubing cup drinker is suitable for use with up to 15 day old chickens for up to 5 weeks. The number of birds per cup should then be reduced to 5 hens per 4007 red cup drinker as the birds grow. Pheasants, quail, and other species are quite at home with these simple drinkers.
Recommended for use in brooders with small numbers of chicks or for broody hens with chicks.
4007 drinker
Installation
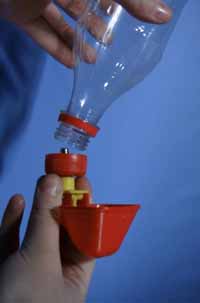
The 4007 red Lubing cup drinker in plastic container such as 1.2 litre soft drink bottle. The most important part is the height of the water above the cup. The ideal height is 300mm (1 foot) from the top of the cup to the top of the water.
Soft drink bottle method (DIY)
- Drill a 9mm hole in the plastic lid of the soft drink bottle.
- Carefully press the threaded end of the yellow nipple against the hole and turn in a clockwise direction. The nipples are designed to self-thread into the plastic and self-seal so they need no sealant.
- Keep turning until end of the thread is up to the flat part of the lid.
- Make a small hole in the bottom of the bottle to allow the air into the bottle.
- Cover the hole with your finger; and fill the bottle with water. Put the cap, with the cup in it, onto the bottle and tighten the cap.
- Turn the bottle upside down, and hang in the bird house.
When hanging drinker in the house, ensure that the lip of the cup is between back and eye height of the birds.
Cleaning
If the water is clean, very few problems should occur. However if the nipple does get blocked or leak, it is almost always dirt in the nipple.
The silver valve can be removed from the nipple, and the inner valve stem removed. CAUTION: Do not lose the valve parts. Wash in water and reassemble.
See also
Drinkers for brooder products
Feeders for Brooders pdf print version
Food should be given to the chicks soon after the water. Though the yolk sack provides sufficient food for the chicks ensure that chicks are eating as soon as they are in the brooder. The sooner the chick eats the sooner it grows. Chicks are usually started with food by using chick crumbs sprinkled on a scratch tray. The noise of the crumbs on the scratch tray triggers off the peck reflex.
After chicks identify food, it should be freely available in chick feeders around the brooder.
The main disease of chicks, leastways the most important early disease is coccidiosis.
Coccidiostats are included in premixed commercial chick rations. If extras are added to the basic ration or home mix food used then the levels of coccidiostat may be too low or non-existent, and therefore the chicks are at risk of not developing immunity.
When using a feeder in the brooder consider space and the amount of chicks in the brooder. Good chick feeder design will ensure most feed ends up in the chicks belly than on the ground for scratching
With chicks, the choice is between round hoppers and troughs. Troughs are good with fine mash feeds however round gravity hoppers work for chick crumbles.
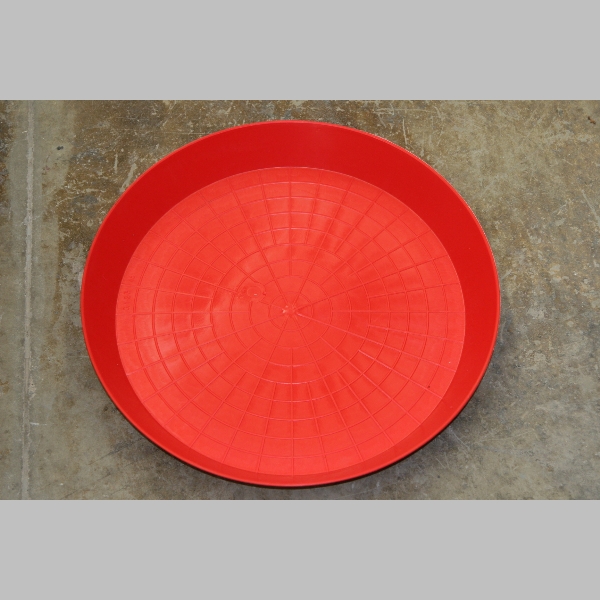
Scratchtray
Scratch trays for day old chicks
6025 round chick feeder. Feeds 10 chicks from day old chicks, with a snap on cover.
Easy metal slide top chick feeders with a stable base to prevent tipping and access holes to prevent soiling and scratching out feed:
- 6026 300mm slide top long chick feeder. Suits 15 day old chicks. 35mm deep at the lip with 14 holes.
- 6027 450mm long chick feeder. For up to 30 chicks from day old chicks.
- 6028 600mm long chick feeder. For up to 50 chicks.
Turbogrow
Turbogrow with 4 kg capacity, suits up to 100 chicks. Great access to feed and doesn’t take up much brooder ‘real estate’.

Maxgrow 1kg for chicks and quail.
Find out more about chick rearing in books available in eshop
See also
Feeders for brooders
Factsheet_Poultry Vitamins print version
Vitamin Supplement
Just incubating your first eggs? If your incubation has been correct and the breeder diet good, you will have a nice batch of chicks hatch out.
So what now?
One of the old stories about chicks is that they can survive from the yolk for 3 days so don’t feed them to use up the yolk. This is supposed to prevent yolk sac infection, which actually is a result of poor incubation plus poor sanitation.
It has been well known for some years that the length of the gut at the end of the first week determines the digestive capacity of the bird for life. If we starve the chick for 3 days, then start feeding the chick, it takes another 2 days for the gut to properly start digesting the food. Then the gut can start to grow.
On the other hand, if we start the digestion on day one it has a full 7 days to grow, and the chicks will be much healthier throughout their life.
In has been an industry practice to give the chicks a dose of vitamins with a sugar carrier at day one to assist in the start-up of the gut. This has been very successful at assisting the successful starting of the chicks. In recent research, it was found that adding some body salts to the mix improved the start even more. So vitamin mixes like Bellbreeder are even better for young chicks.
Often people worry about too much vitamins and minerals. It is very hard to overdose, so don’t worry if the mix is a little strong. I like to use a double strength dose on day 1 and then a standard dose up to 5 days, as stress support anytime there is unusual circumstances, at 5-6 weeks of age when coccidiostat challenge is likely, and then anytime I think they need it.
One of the beauties of Bellbreeder is the broad spectrum of ingredients, another is the super high solubility, and another is the application to all ages of birds.
The super solubility of this mix means it is ideal for making liquid solution.
A 1 litre coke bottle, properly washed, and 1 litre of boiled water, cooled after boiling. Add 1/2 litre to the bottle, pour in 1 sachet of Bellbreeder, and top up with boiled water until full. A quick shake and it will completely dissolve.
Use at the rate of 1 ml per litre of drinking water for general use, 2 ml for day old chicks.
The birds do not care if the dose is variable, so it’s easy to add to a cup or bell drinker, just add the amount of vitamins to the drinker that the birds would drink in a day.
For example, 4 standard layers will drink about 1 litre in a day, so make sure the drinker cup is close to full of water, and then add 1 ml to the drinker. It’s just like a vitamin pill but in the water.
You can keep the bottle in the fridge, properly labelled (it’s not harmful to humans but might not be to our taste) for 1 week without loss of quality.
Bellsouth products for Poultry Vitamins
Radiant Gas Brooders print version
Radiant Gas Brooders
Radiant brooders are designed so that the heat they give off is not by warming the air around them but by RADIATION. Radiation comes from a surface which is hot and has a specific surface which easily emits radiation of the right wavelength to warm the objects in the path of the radiation. The easiest way to describe this is to consider a crisp, cool but sunny day. If you stand in the shade with a thermometer in your hand, the thermometer will read the air temperature. If you took off your shirt, you would feel quite cold. Step out of the shade into the sun and you will suddenly feel quite warm, but the thermometer in your hand will still be measuring the air temperature. Now the difference in what we feel is caused by the radiant heat of the sun. Not the light of the sun, that’s what we see, but the invisible infra-red part of the radiation we cannot see. Now this is what we do with the chickens, use a heater which gives off little visible light but lots of infra-red radiation the birds feel as heat. This is preferable in small brooding situations where we cannot have environment controlled sheds. If our sheds are really well insulated, and made airtight so we can exactly control the inwards and outwards air flow, then brooding with hot air is very useful. However if we have poorly insulated, or open sheds, radiant brooders allow us to have low air temperatures, and yet comfortable conditions for the birds.
Are all gas brooders radiant?
No they are not. Many gas brooders are designed to be used in sheds with good insulation. They heat up the air in the shed, and then the thermostat, which operates on the air temperature turns them off. When the shed air temperature cools, the heater turns on again. These are air heaters. When we use these in sheds which are poorly insulated, the bird feels the combination of some radiant heat and some air temperature. When the heaters are on they feel both, when they are off they just have the air temperature. In uninsulated sheds the heaters need to be closer to the birds, and the effect is rather uncomfortable for the birds, too cold then the heater is off and too hot when it is on.
Radiant heaters are on all the time, providing an area where the combination of air temperature and radiation is comfortable for the birds. If the air temperature rises or falls, the birds migrate slightly, in and out to adjust their own environment so they are comfortable.
How to set up a radiant gas brooder
Firstly hang the brooder at the recommended height for the size of the brooder. Take as an example an SBM size 6 brooder for about 600 chicks. Suspend the brooder at 1 to 1.2 metres above the floor. Set the regulator for about 5. In this range of heaters the regulator at 1 (minimum) has 50% of the heat output of 10 the highest setting. So 5 is about 75% of the capacity. Light the heater an hour before the chicks are placed, then leave the chicks for another half hour with minimum disturbance. Quietly return to the chicks and observe without disturbing them. If the chicks are quiet and formed basically into a ring shape around the heater you know the heat is about right. If they are filling the centre directly under the heater, lower the heater 100mm and again wait half hour. If there is a very large empty spot under the brooder it is too hot lift it up 100mm.
Beware
There is no substitute for observation. If the chicks are noisy anytime something is wrong, and if they form a wedge shape there is a draft somewhere on the pointy end of the wedge. The chicks will tell you if they are unhappy, and the ability to understand the chicks is called STOCKMANSHIP.
By setting up this way leaving the regulator on set level 5, then there is some reserve to turn the heat up if a cold night is forecast, or to turn the heat down if a warm day comes.
Bellsouth for Gas Brooders