
Incubation Preparation
Pre incubation principles are always the same. Enact your pre incubation action plan with the following points and questions…
- Breeder Parents are given vitamins 2 weeks before collecting eggs
- Is the incubator clean and sanitised?
- Is the incubator working – temperature, humidity and fans?
- Single batch or staggered batches of eggs?
- How many eggs for each incubation batch? (considering need for collection and possible storage)
- Incubator room is suitable for incubation needs and
- Hatchabatch app loaded on your smartphone to track batches.
Incubator cleaning_print version
Incubator Cleaning
The inside of the average incubator is a great place for growing all kinds of organisms apart from the embryoes we want to grow. The very nature of the incubator, warm and moist, makes it ideal for the development of many different bugs. Add the waste products and bugs introduced to the incubator at hatching time, and we soon have a very good brew of organisms which will be detrimental to the future hatching success. We are often asked how to clean incubators, and what should we use to effectively sterilise the machines.
The principles of incubator cleaning are the same from the smallest hobby incubator to the largest commercial incubator with 100,000 eggs. Until recent times, the most common method of disinfecting an incubator was to use formalin and condys crystals. These components were mixed in a bowl in the incubator and produced a gas which fumigated the interior of the incubator. This is a very cheap material and very toxic, and was reasonably effective at killing everything (operators included). This effectiveness is often lost because of a lack of physical cleaning of the incubator. The cheapness is also poor value when considering that the material is very dangerous.
Effective incubator cleaning consists of two steps, physical cleaning, followed by sanitising.
STEP 1 There is no substitute for elbow grease. An incubator not physically clean will not respond to later sanitisation. Physical cleaning is best when done as soon as possible after the removal of the chicks at hatch time. Allowing the waste material of the hatching process to dry on the inside of the incubator greatly increases the later workload of cleaning. Physical cleaning is usually best when assisted by a detergent. The froth and bubble from detergents is not a disinfectant or a sanitiser, but they are cleaners. Detergents are intended to lift dirt and usually contain surfactants which hold the dirt so it can be washed away. The best cleaning is done using a mechanical device such as a sponge mop or broom for bigger machine, or a hand sponge for small machines.
STEP 2 Sanitising or Sterilising. Once the surfaces are physically clean, a sanitiser will kill bacteria, virus and fungus spores so that these will not contaminate the next setting of eggs. The selection of sanitising agent is often a confusing process and many different products are available.
Formaldehyde is now considered too dangerous. Chlorine is a very common disinfectant found in most homes as household bleach. The usual dilution on the bottle is correct as a spray rinse in the incubator, and a few drops in the water tray are an excellent fumigator. Bleach becomes inactive in the presence of organic material. So is only good on nice clean surfaces. NappiSan is an oxygen bleach which is also effective as an incubator disinfectant but can be corrosive on metals. Numerous other disinfectants are available (see list below) and all have a useful place.
The method of application of the sanitising agent is also important. Two different main methods are used. One is the spraying or misting of chemical into the incubator and onto the surface of the incubator with a small pump pack. The incubator should be warm and run after the application of the sanitiser. The other method is fumigation where a sanitiser is evaporated into a gas form and the fumes reach all corners of the incubator. This method is most suited to larger incubators.
STEP 3 This last step is not so much about the cleaning of the incubator but of its future life. A very common problem with incubators and hatchers of all sizes, from the smallest to the largest, is corrosion caused by moisture and disinfectants. Cleaning an incubator involves getting it wet, then sprayed with disinfectants. Many of the disinfectants are by nature corrosive and result in a degrading of incubator components. However the corrosive nature of most of these products greatly reduces once they are dry. Washing and incubator, leaving it wet and storing it away on the shelf is a great way to have a failure as soon after start up next season. After washing, and sanitising, dry the incubator by leaving the unit run for at least a day or so to completely dry out. This ensures no moisture is left in the system to corrode away at vital components.
See also
Bellsouth incubator discinfectant products
Bellsouth Youtube Channel
Larger Incubation best practice_print version
Larger Incubator and best practice
Disease Control and Management in larger incubators
When commencing expansion from small scale incubation into the larger multistage incubators, it is important to realise the increased risks of disease transmission this entails. When doubling the number of eggs incubated the risk of disease transmission increases by the square of the increase. So if we double the number say from 50 eggs to 100 eggs, there is 4 times more risk of disease problems. Double again from 100 to 200, increased by 4 times more, and double again to 400, increases by 4 times more. So the risk increases 64 times when we increase incubation from 50 to 400 eggs. So it is important to take measures to minimise the risk.
In days gone by, the use of formaldehyde fumigation was a standard practice. The potent nature of this method compensated for many poor practices regarding cleanliness of incubators, and minimised the disease transmission on the eggs because of feather dander and dust of multi stage incubation. This technique is now understood to be very dangerous for the users and also the ingredients are much harder to obtain. In recent times, mycoplasma and Marek’s disease have increased as a result of the cross contamination in the incubator.
So alternative techniques are required to obtain similar risk minimisation to the old style fumigation.
The practices here also apply to smaller scale incubation, but are less critical in small scale.
1/ Egg collection. Remember 1 contaminated egg in an incubator of 400 eggs contaminates the lot. So select only clean eggs with good shell quality. Candle eggs to ensure no cracks and to ensure the shell looks uniform and strong. Eggs are best not washed but sanitised. A simple but effective process is to place freshly collected eggs into a plastic egg tray as used in the incubator, and sprayed with warm Virkon disinfectant. The tablet form of Virkon means 1 tablet in a 500ml hand pump spray will treat hundreds of eggs and maintain its disinfection for up to 1 month after mixing. As long as the mixture is pink it maintains its activity. Spray the eggs until the eggs are covered and allowed to air dry.
2/ Use a separate machine for incubation, called an incubator or setter, and another for the last 3 days, called a hatcher.
3/ Set eggs weekly into the incubator, moving the eggs down when the new eggs are placed in the incubator.
4/ Add a small amount of chlorine (like Nycex) into the incubator water to fumigate the incubator.
5/ Three days before hatch is due move the eggs into another incubator for the hatching process.
6/ After hatch, thoroughly clean the hatching machine removing all dust and dander, and hatch debris. Wash using detergent to lift any soil and stains. Vacuum vents. Sanitise using a suitable sanitiser (like Virkon or Nycex).
These measures mean that the main large incubator is kept clean and dirt free, and is easy to keep in prime condition. In addition, the conditions of the setter are ideal for the incubation of the eggs rather than the up and down of the variable conditions caused by the hatch process.
It also means that a low cost hatcher will take all the heavy wear and tear. It is far better to wear out a small low cost hatcher, then the expensive main setter.
Shell Quality the Missing Link print version
Shell Quality the Missing Link
Over the last 2 years shell quality has been one of our most stubborn problems. Now we have larger and larger numbers of birds coming to maturity, and larger numbers of birds with long term stubborn shell problems.
Why are we concerned about shell quality?
There are two main reasons.
Firstly, uniformity of shell density makes the task of incubation easier. When all eggs have similar shells, then all lose weight at similar rates, and all breathe about the same.
Secondly, shell densities have been shown with other avian species to have a direct relationship with fertility. This has always worried me because it seems logical that overly porous eggshells should be more difficult to hatch but illogical that the outside cover of the egg should have anything to do with whether or not the sperm has united with the female egg cell on the side of the yolk. It is explained it by the fact that the eggs in the trials were all incubated for 10 days prior to examination for fertility. A clear egg was assumed infertile whereas it may have been an early embryo mortality, is one where the chick did not commence development even though it was fertile. The conclusion drawn, is that many shell problems are the result of metabolism being so bad that the basic nutrition is abnormal not just the shell metabolism.
From observations, several groups of birds make poor shells:
1. Immature birds. These young birds seem to either lay the first number of eggs with poor shells and then come good, or sometimes persist throughout the season, producing good eggs in the next season. However it is not always a problem of immaturity. Many young females lay excellent eggs from the first egg onwards.
2. The second group is the birds which always lay poor eggs, season after season.
3. This group tend to lay poor eggs for the first 3 or 4 in a clutch, then quality is good until the commencement of the next clutch.
4. The fourth group are birds which have laid well for a season, or part of a season, and then for unexplained reasons, commence laying poor shells and never seem to return to original form.
5. A fifth group could be added, where the shell quality is good for the first 50 or so eggs for the season, then a gradual decline in quality is observed. This will occur mostly in birds where the laying rate is particularly high, and the quality recovers after a rest from lay.
6. This group have misshapen shells which are evidence of mechanical damage during the formation process i.e. scarred ovary. This group are not affected by the above most of the following procedures.
7. Those which are bad shells because of toxins in the diet, either pesticides, heavy metals, or by products of fungal growth in the food. It is possible that zeolites will assist with this problem.
Recent research has shown however that the poor shell problem may be related to an inability of the breeding bird to properly mineralise the shell through insufficient Vitamin D3. Mineralisation is used to describe the process of mobilisation of the calcium from diet, and bone stores, and redeposit the calcium in the correct FORM or MATRIX in the shell.
However additional vitamin D3 does not cure the problem. This is where the cause and effect gets a bit complicated. Normal dietary D3 is similar to the normal D3 produced by the bird’s body in response to the sun. However neither of these forms of D3 are the correct forms for mobilisation of the calcium for bones and shell. So we will call these D3(a). The scientific description is too long and unmemorable. The D3(a) is absorbed from the digestive system and converted by the liver to another form of D3 which we will call D3(b). But the D3(b) is still not what is needed so the kidneys convert the D3(b) into D3(c). However to do this a special enzyme called 1hydroxylase is required.
Any reduction of this enzyme reduces the blood levels of D3(c) and the ability to mineralise shell and bone. Now this enzyme appears to require Vitamin C for its production. So low levels of vitamin C mean low levels of 1- hydroxylase and so low levels of Vitamin D3(c), and so poor bone and shell.
In birds, Vitamin C is manufactured in the kidneys and so is usually considered not necessary to be added to the diet. Vitamin C production may be influenced by many variables.
These are:
• Genetics – some strains me be able to make more than others.
• Disease – Infectious bronchitis is a common avian disease with little exterior symptoms in mild cases but with a great ability to permanently damage the kidneys.
• Parasites – many worms directly affect the kidneys and their ability to function.
• Excess salt in water or feed ties up the kidneys in the function of salt removal and so can reduce output of Vitamin C.
• Stress – This may cause the vitamin C output to be diverted to other functions.
• Infection – Again the Vitamin C is diverted to other functions and so reduces availability for shell and bone development. Infection in the oviduct is known to directly affect the shell quality by interfering with the mineralization site. This is not what we are trying to counteract here, but any infection responds to additional vitamin C.
At this point, it is again useful to speculate about the interrelation of the shell density and infertility.
Is it not reasonable to assume that if the bird is fighting stress, disease or permanent kidney dysfunction, that the B group vitamins which are essential for development of the embryo but are also essential for stress relief may also be diverted from the production of egg products and instead used for body survival?
A word of caution. Vitamin C will effect bowel motility or speed of action. This means large doses suddenly may give the bird problems particularly as the long bowel may be fast at one end and slow at the other.
We have introduced a program on a number of farms and have had mixed results. Some birds have shown a dramatic change in the quality of the shell, with others less dramatic a change. It may be coincidence, as our trials are less than clinical. However the initial results are very encouraging.
The outcomes favour of the use of beneficial bacteria with chicks, and enzyme treatment for adults. Is it not possible that as the production of enzymes is also a function of correct gut flora, and that incorrect gut flora has a part here? So birds with incorrect gut flora will be more susceptible to shell problems.
In young chicks the ability to make vitamin C is less than for adults. In addition, the possibility that chicks will be under stress is also high, and in intensive conditions, the possibility of subclinical diseases is also high. All these factors point to a possibility that bone mineralization problems with chicks, i.e. leg rotations, etc. may be related to this same mineralization process which is effecting the eggs, and so vitamin C may be of use with leg problems.
I have discussed this possibility that Vitamin C is implicated in the shell and bone problems with overseas specialists who also agree that there is likely to be something in the process.
Improvement in enough cases is reason to risk the recommendation.
A suggested program:
This program is suggested as a minimum. However use caution and do not increase the rate of Vitamin C too fast to allow the bird to get used to the increased bowel speed.
125 mg per day for 5 days
250 mg per day for 5 days
500 mg per day for 1 0 days.
The Vitamin C has been given in tablet form using standard human 250mg Vitamin C tablets.
I am as always interested to hear from users of this program to confirm its wider use and value.
2ND EDITION
In more recent times, experiments with sick birds with other problems given higher doses of Vitamin C as Sodium Ascorbate in powder form. We have been able to go up to 10 grams per day with no apparent effect on bowel motility. So, with caution I think we can go to much higher doses.
I have also some feedback, where the suggested program has been of no effect, but a dose of 5 grams per day has produced the desired result. So it appears we may have been a little conservative in our initial program.
Vitamin mixes are available for poultry –
Solvita and Bellbreeder
Check your thermometer
A mercury or spirit separation can be determined by careful visual inspection and/or by subjecting the thermometer to a known temperature and checking to see that it is reading correctly.
1. Place the thermometer on a flat surface with the bulb to the left and examine it carefully. The mercury or spirit in the bulb should appear as a continuous line from the bulb into the capillary and up to the beginning of the contraction chamber. The separation is most often evident in or above the chamber.
2. Determine how the separation is situated. If the separation is a free piece of mercury in the chamber (see illustration #1) then proceed to paragraph 4.
3a. If the mercury is wedged in the upper end of the chamber and/or extends up into the capillary (illustration #2), cool the bulb by dipping it into a cold water and ice mixture a few seconds at a time until the wedged mercury retreats into the chamber and forms a droplet. Proceed to paragraph 4.
3b. If the separation is at the lower end of the chamber and/or in the capillary below the chamber (illustration 3), warm the bulb by dipping in and out of warm water until the separation rises higher into the chamber and forms a loose droplet. Proceed to paragraph 4.
3c. If a piece of mercury from the main column has risen to the expansion chamber and become lodged there, it will be necessary to first force the separation to the lower portion of the expansion chamber as explained in paragraph 4, and then to warm the bulb (paragraph 38) until the main column rises into the chamber and joins with the separation. Proceed to paragraph 6.
3d. If the range of the thermometer is such that the main column is continuous up into the expansion chamber, as would be the case on a thermometer whose upper range is below room temperature and the mercury is separated in the expansion chamber, refer to paragraph 4.
4. Holding the thermometer exactly vertical, tap it gently but firmly downward onto a padded surface such as a magazine, pad of paper or the like. Repeat as necessary. The force generated by tapping will drive the separated droplet further down the chamber to rejoin with the main column. Proceed to paragraph 6
5. If the column appears to be intact from the bulb to the top of the column and yet the thermometer indicates a falsely high temperature, the Likelihood is that some of the nitrogen gas (the invisible gas above the column used to keep pressure on the column) has become trapped in the bulb. If this is the case, it will be necessary to subject the lower half only of the bulb to dry ice or suitable low temperature medium to retract all the mercury down into the bulb.
Holding the thermometer exactly vertical, tap downward onto a padded surface as described above to displace the nitrogen. Allow to return slowly to ambient temperature (do not heat).
6. Important! Prior to returning the thermometer to service it is good practice to check the thermometer at a known temperature to assure that the mercury separation repair was successful.
Large Incubator Management_print version
Disease Control and Management in larger incubators
When commencing expansion from small scale incubation into the larger multistage incubators, it is important to realise the increased risks of disease transmission this entails. When doubling the number of eggs incubated the risk of disease transmission increases by the square of the increase. So if we double the number say from 50 eggs to 100 eggs, there is 4 times more risk of disease problems. Double again from 100 to 200, increased by 4 times more, and double again to 400, increases by 4 times more. So the risk increases 64 times when we increase incubation from 50 to 400 eggs. So it is important to take measures to minimise the risk.
In days gone by, the use of formaldehyde fumigation was a standard practice. The potent nature of this method compensated for many poor practices regarding cleanliness of incubators, and minimised the disease transmission on the eggs because of feather dander and dust of multi stage incubation. This technique is now understood to be very dangerous for the users and also the ingredients are much harder to obtain. In recent times, mycoplasma and Marek’s disease have increased as a result of the cross contamination in the incubator.
So alternative techniques are required to obtain similar risk minimisation to the old style fumigation.
The practices here also apply to smaller scale incubation, but are less critical in small scale.
1/ Egg collection. Remember 1 contaminated egg in an incubator of 400 eggs contaminates the lot. So select only clean eggs with good shell quality. Candle eggs to ensure no cracks and to ensure the shell looks uniform and strong. Eggs are best not washed but sanitised. A simple but effective process is to place freshly collected eggs into a plastic egg tray as used in the incubator, and sprayed with warm Virkon disinfectant. The tablet form of Virkon means 1 tablet in a 500ml hand pump spray will treat hundreds of eggs and maintain its disinfection for up to 1 month after mixing. As long as the mixture is pink it maintains its activity. Spray the eggs until the eggs are covered and allowed to air dry.
2/ Use a separate machine for incubation, called an incubator or setter, and another for the last 3 days, called a hatcher.
3/ Set eggs weekly into the incubator, moving the eggs down when the new eggs are placed in the incubator.
4/ Add a small amount of chlorine (like Nycex) into the incubator water to fumigate the incubator.
5/ Three days before hatch is due move the eggs into another incubator for the hatching process.
6/ After hatch, thoroughly clean the hatching machine removing all dust and dander, and hatch debris. Wash using detergent to lift any soil and stains. Vacuum vents. Sanitise using a suitable sanitiser (like Virkon or Nycex).
These measures mean that the main large incubator is kept clean and dirt free, and is easy to keep in prime condition. In addition, the conditions of the setter are ideal for the incubation of the eggs rather than the up and down of the variable conditions caused by the hatch process.
It also means that a low cost hatcher will take all the heavy wear and tear. It is far better to wear out a small low cost hatcher, then the expensive main setter.
Bellsouth for Disinfectant
The Bellsouth Hatchabatch App assists with incubation guides and calendar reminders.
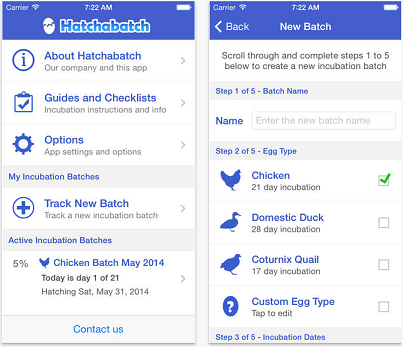 Hatchabatch app
Free on Android
Breeder Diet affects hatch rate
Vitamin supplements are useful for all grades of chicken production. Breeding and layer birds are even more important. The reality is that unlike mammalian babies, a bird embryo grows in a food package where all the food that the growing embryo has access to must be in the egg before it is laid.
Now to make an egg we need a few things. We need protein, carbohydrate, fat, water, and the right light to stimulate the laying of the egg. The level of micro nutrients needed to make an egg are very low, and numerous research reports show the bird will lay eggs even when the micro nutrient levels are very low.
But when it comes to growing embryo’s micro nutrients are everything. The vitamins and minerals are essential mediators in numerous growth functions, and without them, embryos peter out and die or produce weak chicks.
The best assistance we can give a chick starts before the egg is produced. Micro nutrient levels are easy to influence but at times its just hard to know that the food we are giving has the high levels which make ideal chicks. So supplements are used to ensure these levels are good. Most B group vitamins need to be available in the bloodstream the day the egg is laid, fat soluble vitamins are stored up in the yolk, and minerals are present in both. In addition, many of the amino acids need to be available in correct levels the day the egg is laid.
So there are good arguments for breeder supplements to ensure these are right. This becomes more important the rarer the breed, as often the selection for the rare traits has included unknowing selection for nutritional requirement. This explains the inbreeding factor, which often is represented by changed nutrient requirements when breeding from a small population.
Amino acids are made up of 2 groups, the essential amino acids, they must be in the diet, and non essential amino acids, these are the ones the birds metabolism can make but only if the is a surplus of the essential ones.
Both of these are excellent for use in breeder diets.
Vitamins – Why use them anyway?
A common statement made is “but I free range my birds so they have all they need”. It is however, an urban myth that poultry can get all they need from a few handfuls of grain and grass. This myth denies the fundamentals of poultry biology.
In the wild, the bird lives on wild animals, mainly insects, ( its beak is a killing beak), seeds in season, plus sprouted seeds.
Our modern perception of of greens is mature leaves which have passed the sprout stage and have converted to cellulose, a description of most of our pastures and grasses. These are broadly broadly speaking, insoluble to poultry. Sprouts are a highly digestible ingredient sought by the birds. Grains are an opportunistic find for wild poultry and the bird has a strong instinct to seek the concentrated energy of the seeds.
To replicate the diet in a domestic backyard is difficult, providing 2-300 grams of grains is easy, 200 grams wet weight of sprouted grains to provide the vitamin content is harder,and another 1000 kg of wet weight of live insects and animal food, the hardest of all.The bird in the wild also lays only 25 eggs per year, but our domestic fowl have the potential to lay 300 per year.
So what can we feed the birds? There are two ways which are common:
Mixed grain “all natural” diets are the flavour of the day. A bunch of grains are thrown in a bag and call a balanced diet. However these diets are notorious for being high in fat, and low in protein. This results in the surplus fat being stored in the abdomen of the bird and in the long term results in greatly reduced laying performance as the egg production space is taken up by the fat layers. In addition, the imbalance of the nutrients will cause the birds to sort the grain, in the search of the balance of nutrients which the the bird’s body requires.
Sometimes the mixed grains have a “protein and vitamin” pellet added to balance the diet. This strategy does not work well unless the birds are forced to eat all the ration. A deep feeder with an anti-flick grill is essential for ensuring all the feed is consumed.
The other way is a balanced pellet diet which has all the protein, carbohydrate, and fat needed for good production plus a supplement of vitamins and minerals to make up for any analysed deficiencies in the ingredients used.
Often people say but my birds don’t like the pellets misunderstand the instinctive drive (eat the grain, it has limited availability) as not liking the pellet. But in reality of the bird is hungry, it will eat almost anything, and the pellet form of diet is a balanced with all production nutrients included.
Use the pellet in the feed hopper, the birds are less likely to sort the feed if it is only pellets, and use the instinct for the grain to keep the birds digging over the shavings litter in the shed.
The last way is more difficult for a backyarder with small flocks. It is called free choice feeding, and it consists of a series of feeders each with a different type of grain, and one with a 50% protein supplement. The birds learn to balance their diet quite finely and vary the amount of each grain in accord with the weather and the status of lay of the flock.
Another common misunderstanding about diet is the concept that ïf the bird is laying well then it has all the nutrient it needs.
But when it comes to breeding, or to handling stress in hot weather, this is not necessarily true.
If the bird has sufficient protein, carbohydrate, fat, water, and importantly light, then the bird will lay eggs.
However, the level of micro nutrients needed to allow proper hatch is another matter.
The level of micro nutrients demonstrably has a low effect on the rate of lay until the level is so low that the general health of the bird declines. It has an immediate effect on the ability of the embryos to develop, and has a dramatic effect on the hatch and quality of the chicks.
Its just like when a woman is having a baby. First thing the doctor does is recommend a range of micro nutrients to ensure proper growth of the baby.
Incubator Room
Ideally, your incubator will be placed in an insulated room with a stable temperature over 15 degrees Celcius. A well ventilated room without doors, windows, excessive noise or vibrations is suitable for an egg incubator. Why? Windows and doors create air movement in rooms and potentially vibrations i.e. door slamming.
Ensure that any piece of equipment that contains electrical, digital parts has an accessible power point. Purchase a good quality power surge protection board and a UPS (uninterrupted power supply) to avoid the effects of brown outs.
When there is diurnal range i.e. cold nights and warm days, you may find your incubators condenses each morning, which will adversley affect your humidity levels.
Place incubator on a table with an insulated surface i.e.towel or felt, so that the surface is not excessively cold or hot. If there are draughts or cold air movement in the room, you can alleviate this by placing a cardboard surround around incubator or pillows to block cold air moving over incubator.
Place your incubator in a space that allows the incubator to perform at its best with your growing chicks.