
Manuals and Guides
We are always adding various manuals for your poultry gear such as drinkers, existing and old incubators, egg equipment and more…
Incubator instruction manuals various formats
Rcom incubator instruction manual database, at Rcom website
Bellsouth 100 instruction manual B100 Instruction manual or the Bellsouth 100 incubator on Bellsouth YouTube
Multiquip SpaceMaster Advertisment (old) on Bellsouth Slideshare
Multiquip Ostrich Incubator instructions (old) on Bellsouth Slideshare
Multiquip E1 instruction manual (old) on Bellsouth Slideshare
Multiquip E1, E2 and E3 instruction manual (old) on Bellsouth Slideshare
Covatutto 20 Instruction manual (old) on Bellsouth Slideshare
Covatutto 20 Instruction manual (old) on Bellsouth Slideshare
Lyon RX incubator brochure information
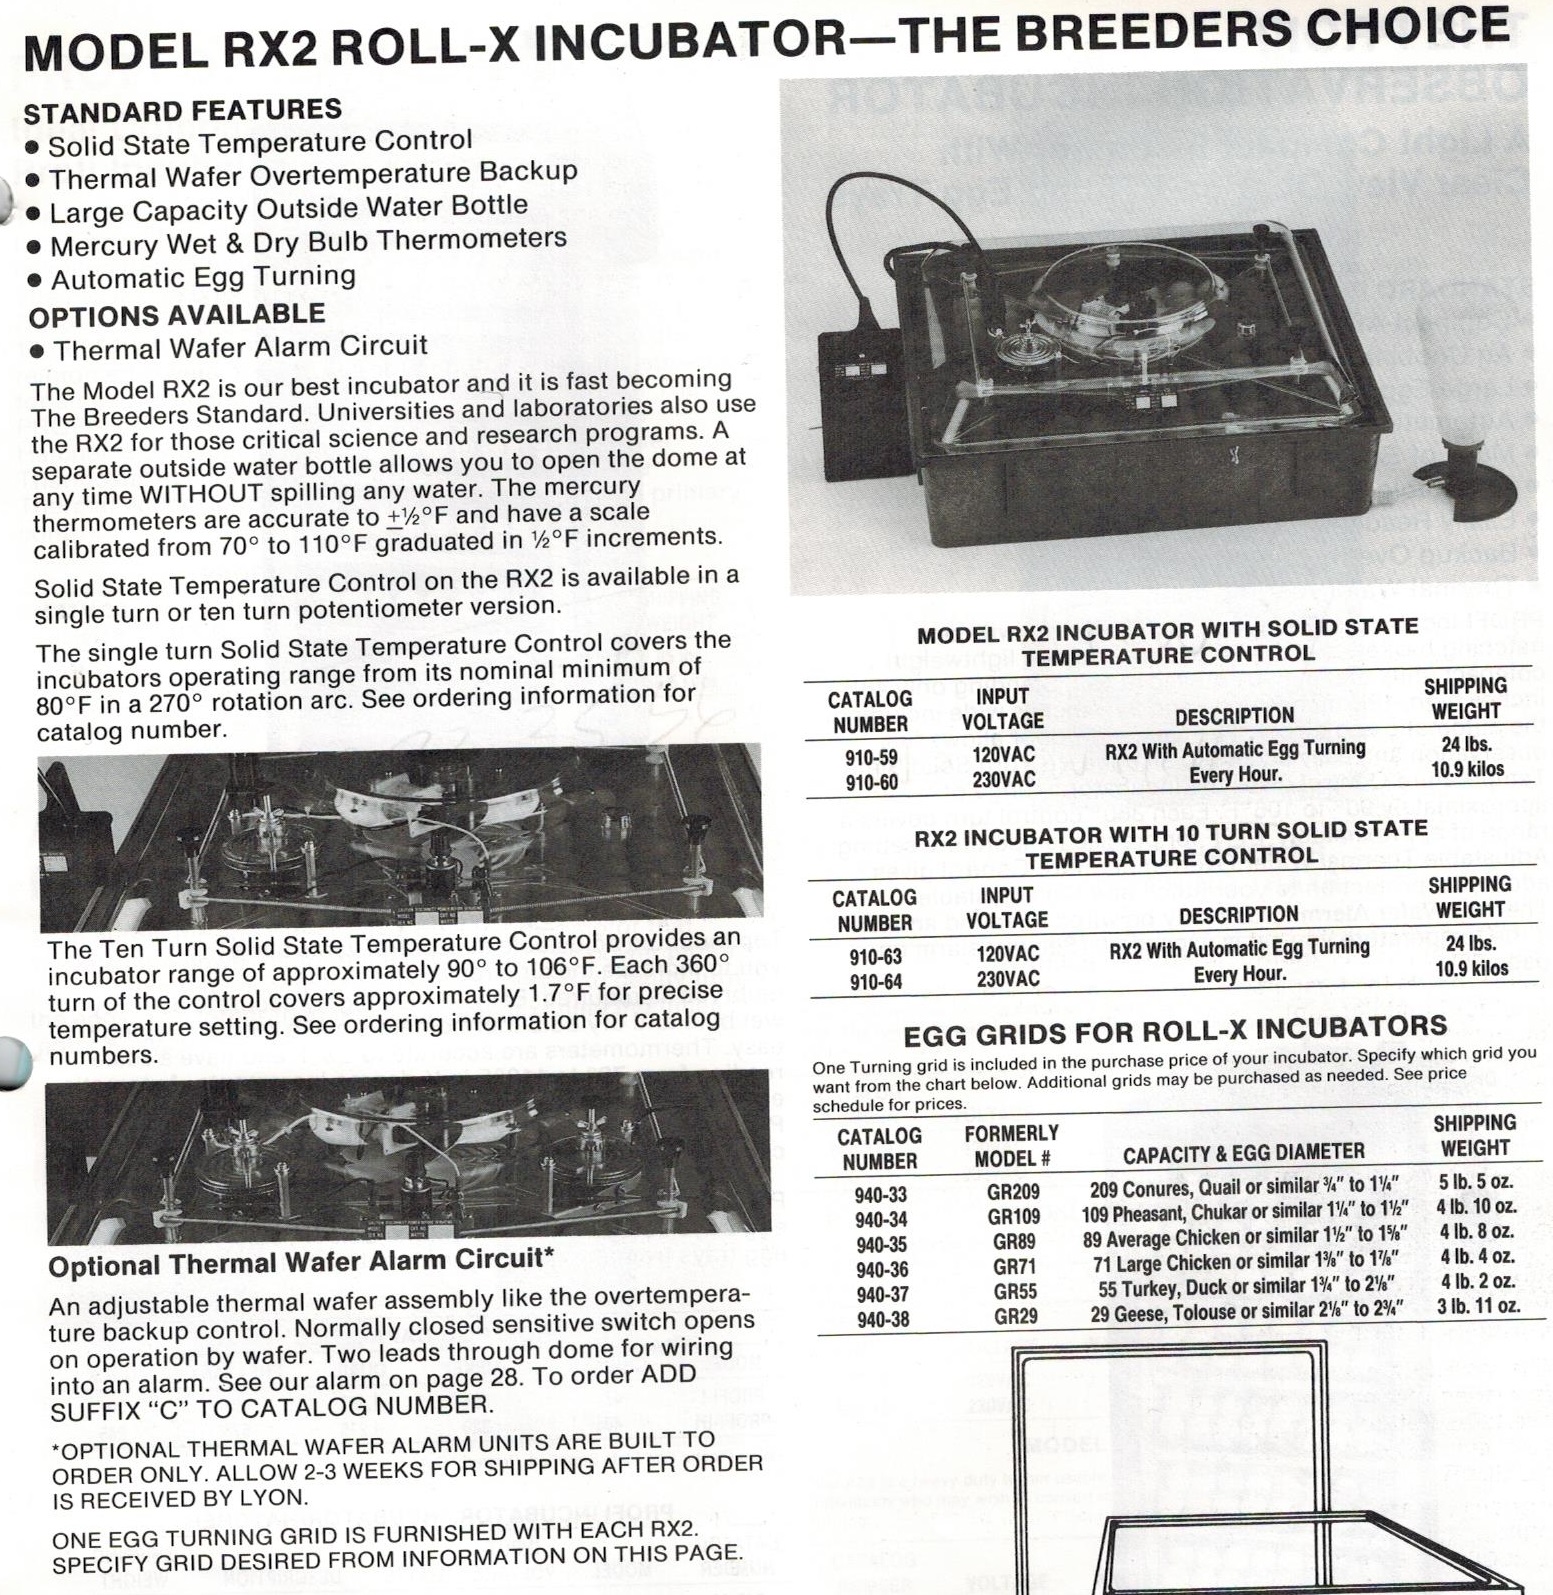
Lyon RX information
Lyon RX incubator instructions
Lyon RX incubator roller instructions instructions
Lyon RX incubator instructions for Marsh Rollex (RX) incubators (old manual)
Lyon RX incubator parts for Marsh Rollex incubators (old manual)
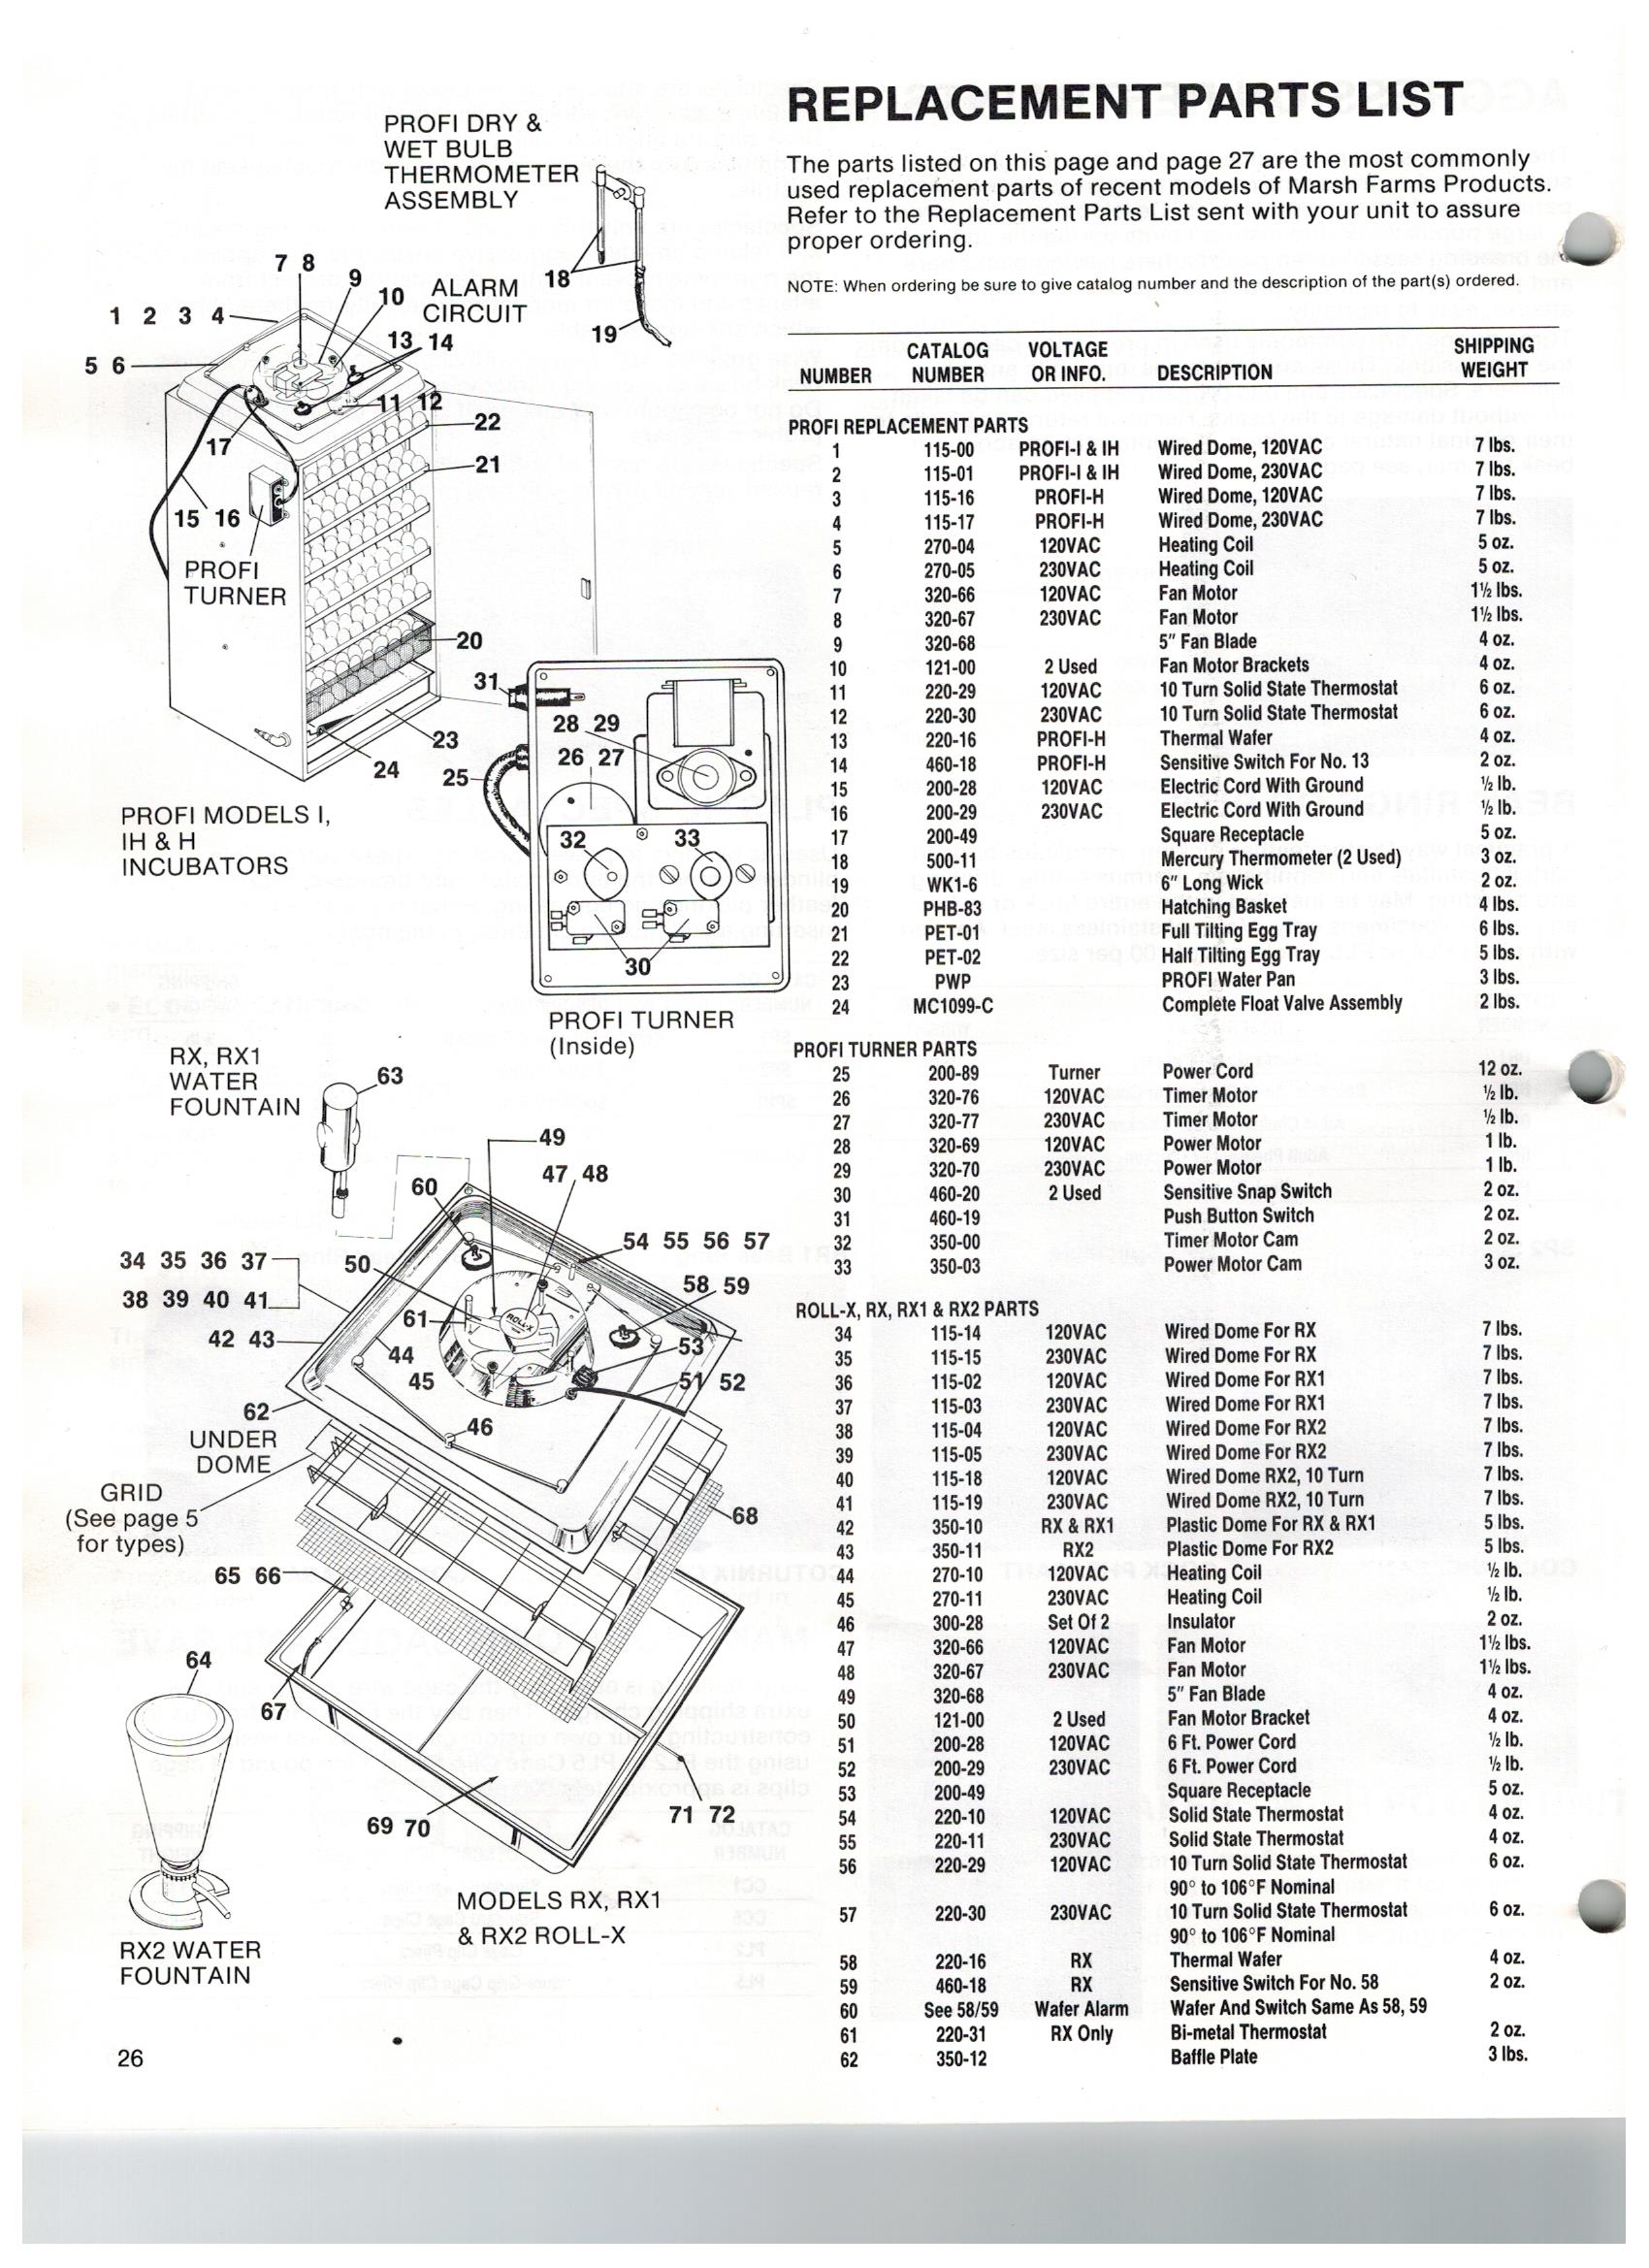
Lyon RX parts
Lyon incubator instructions-to-install-solid-state-temp-controller
 Lyon solid state thermostat
Lyon TX6 replacement parts TX6
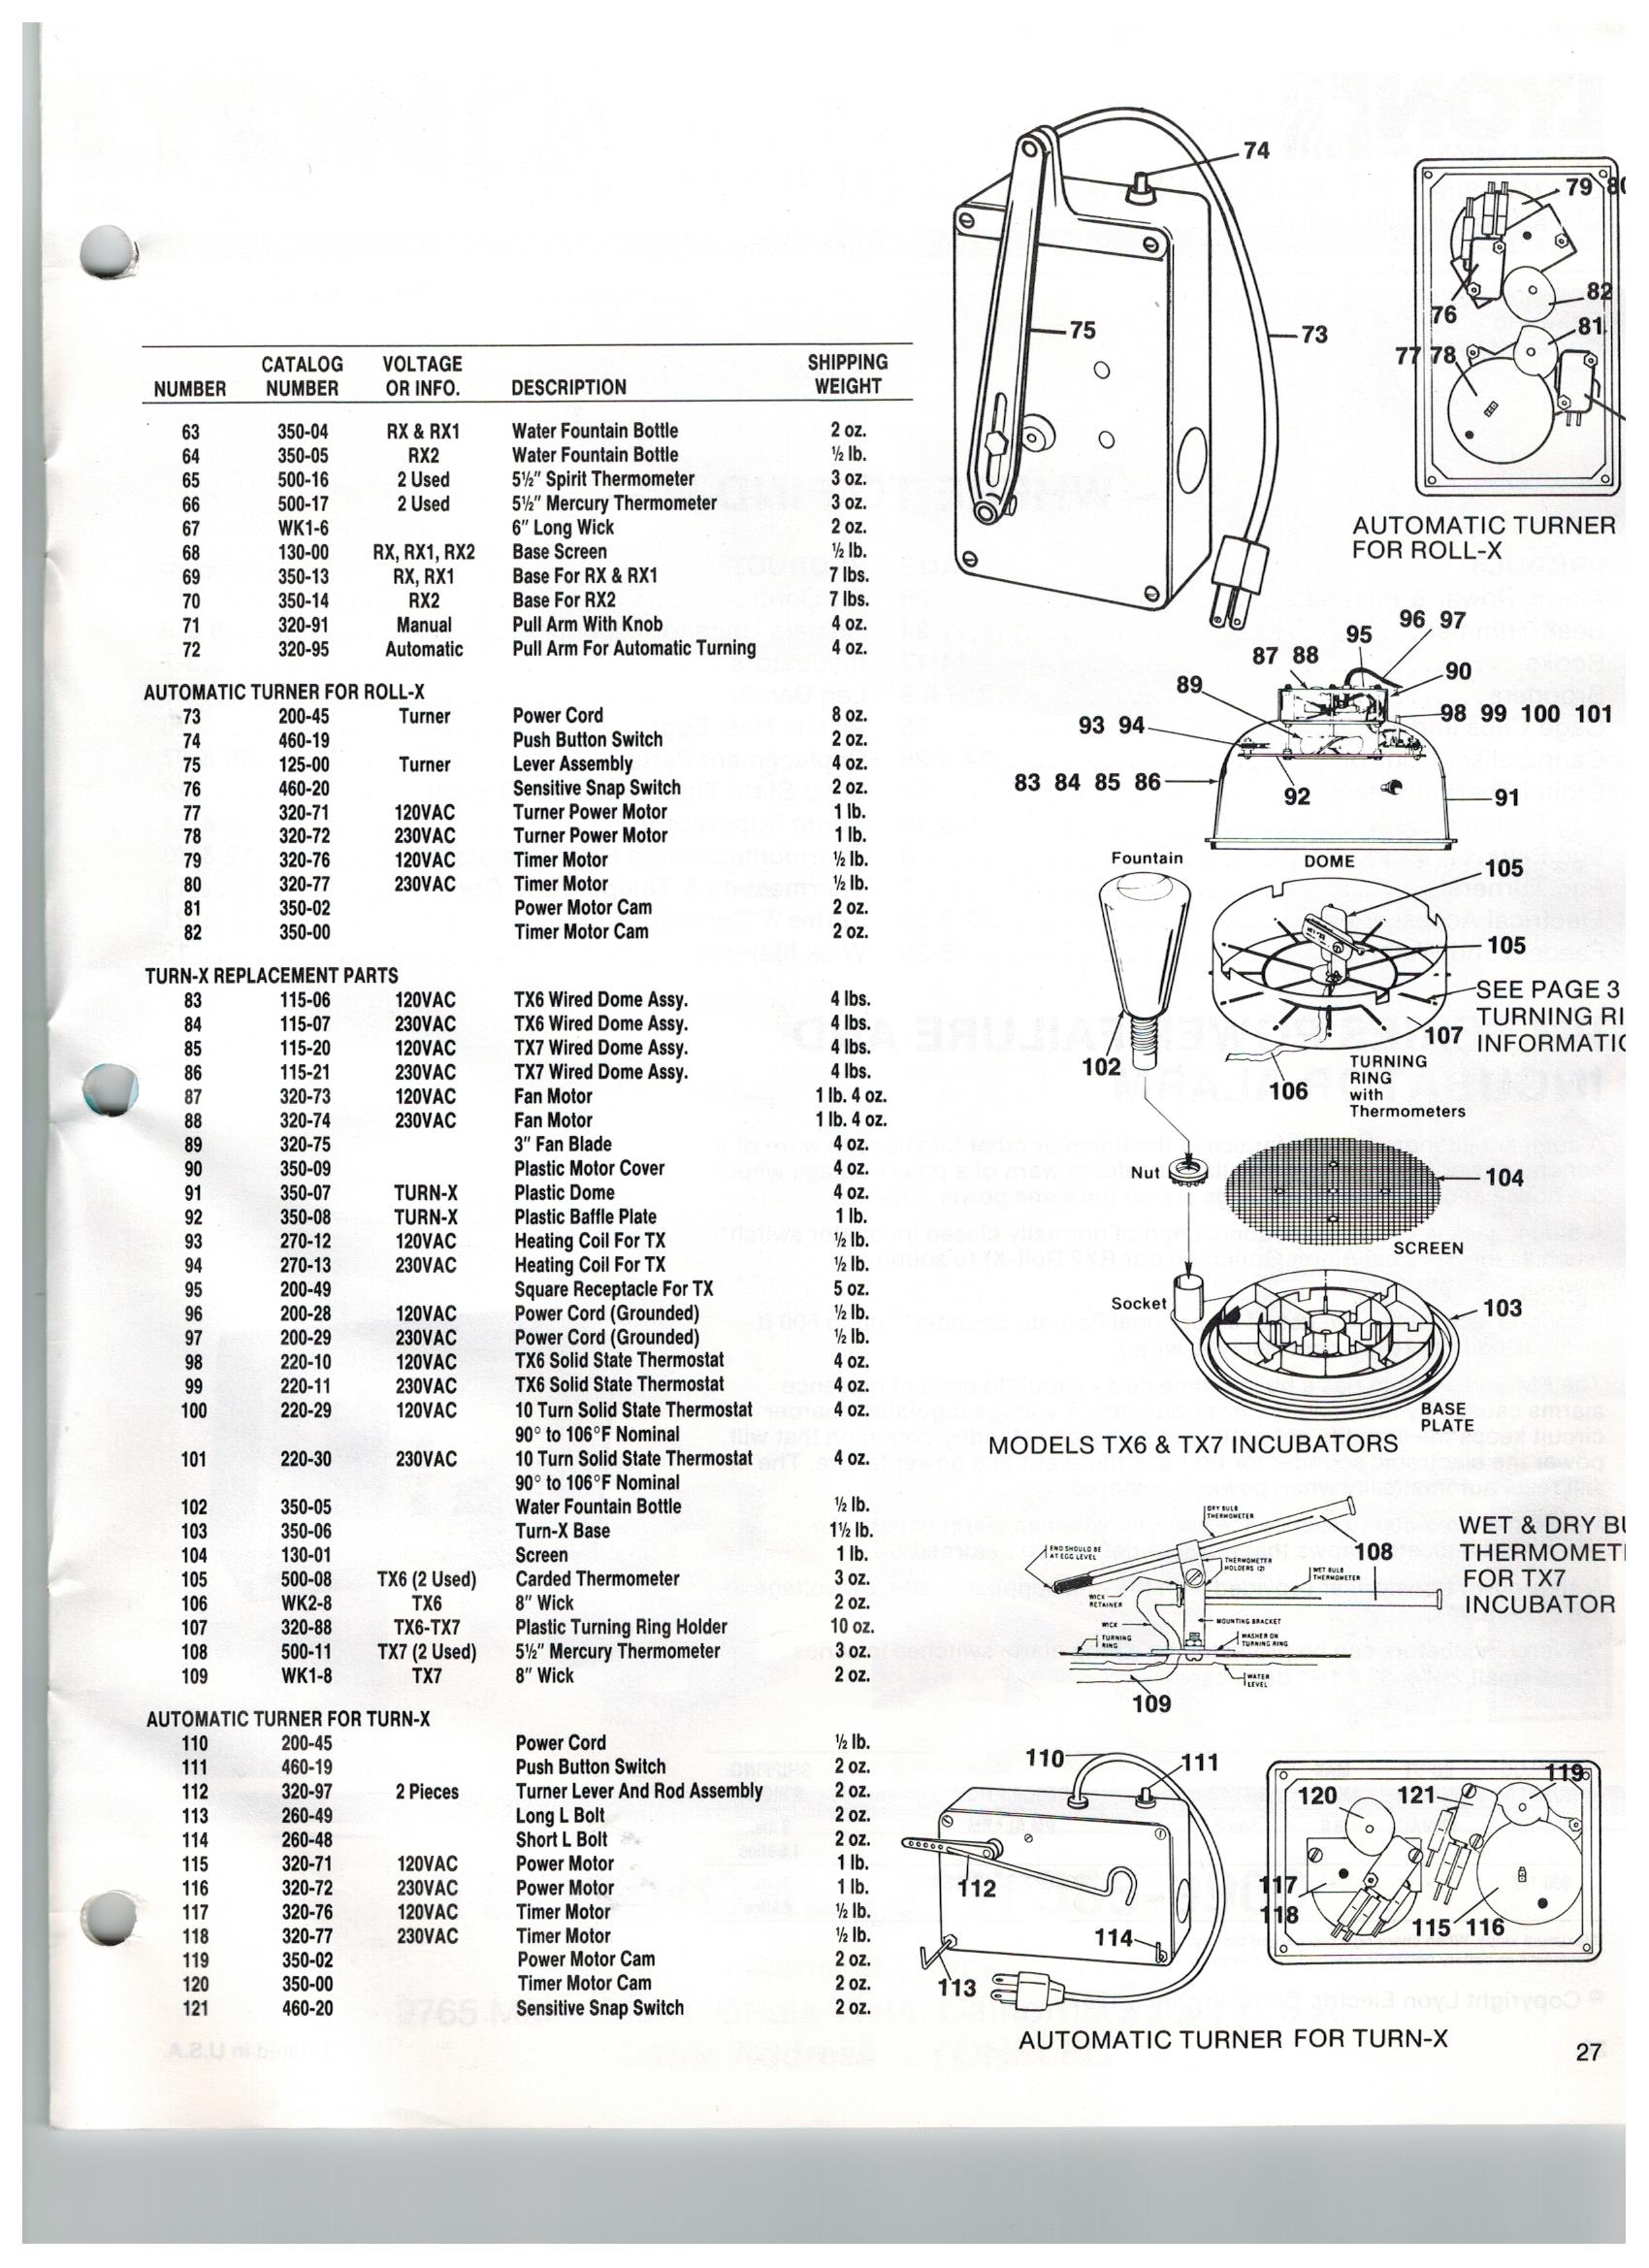 Lyon TX parts
Lyon thermometers and hygrometers
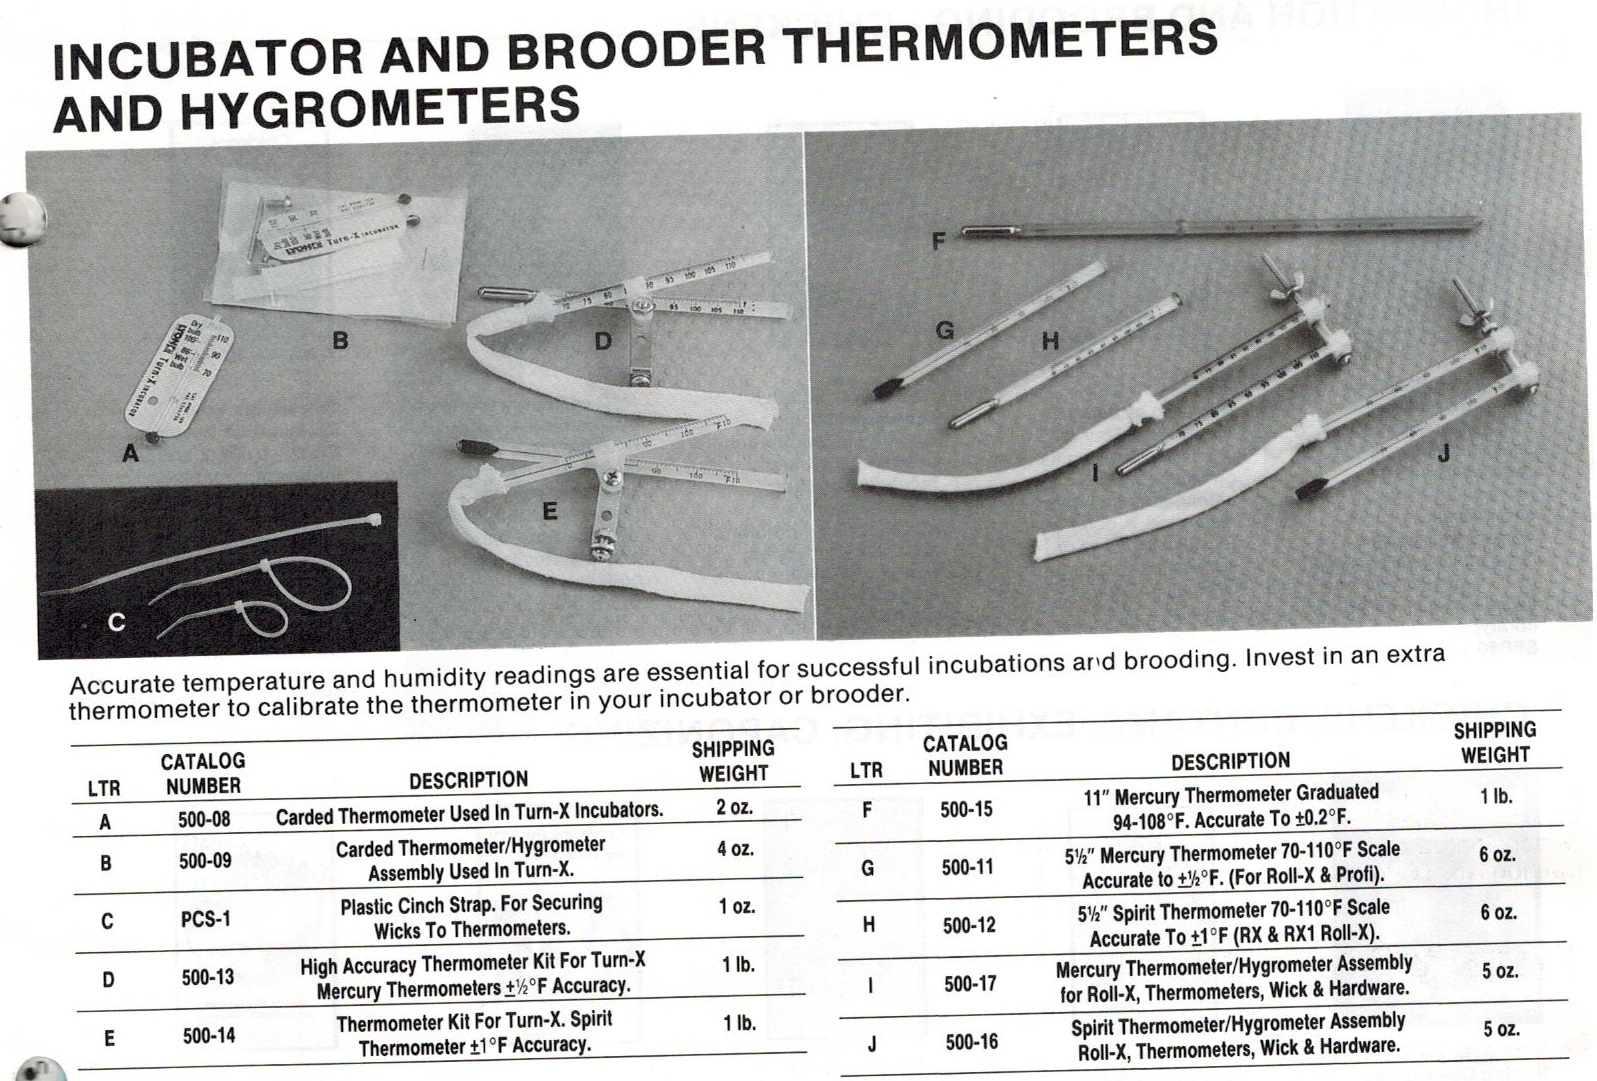 Lyon thermometer hygrometer
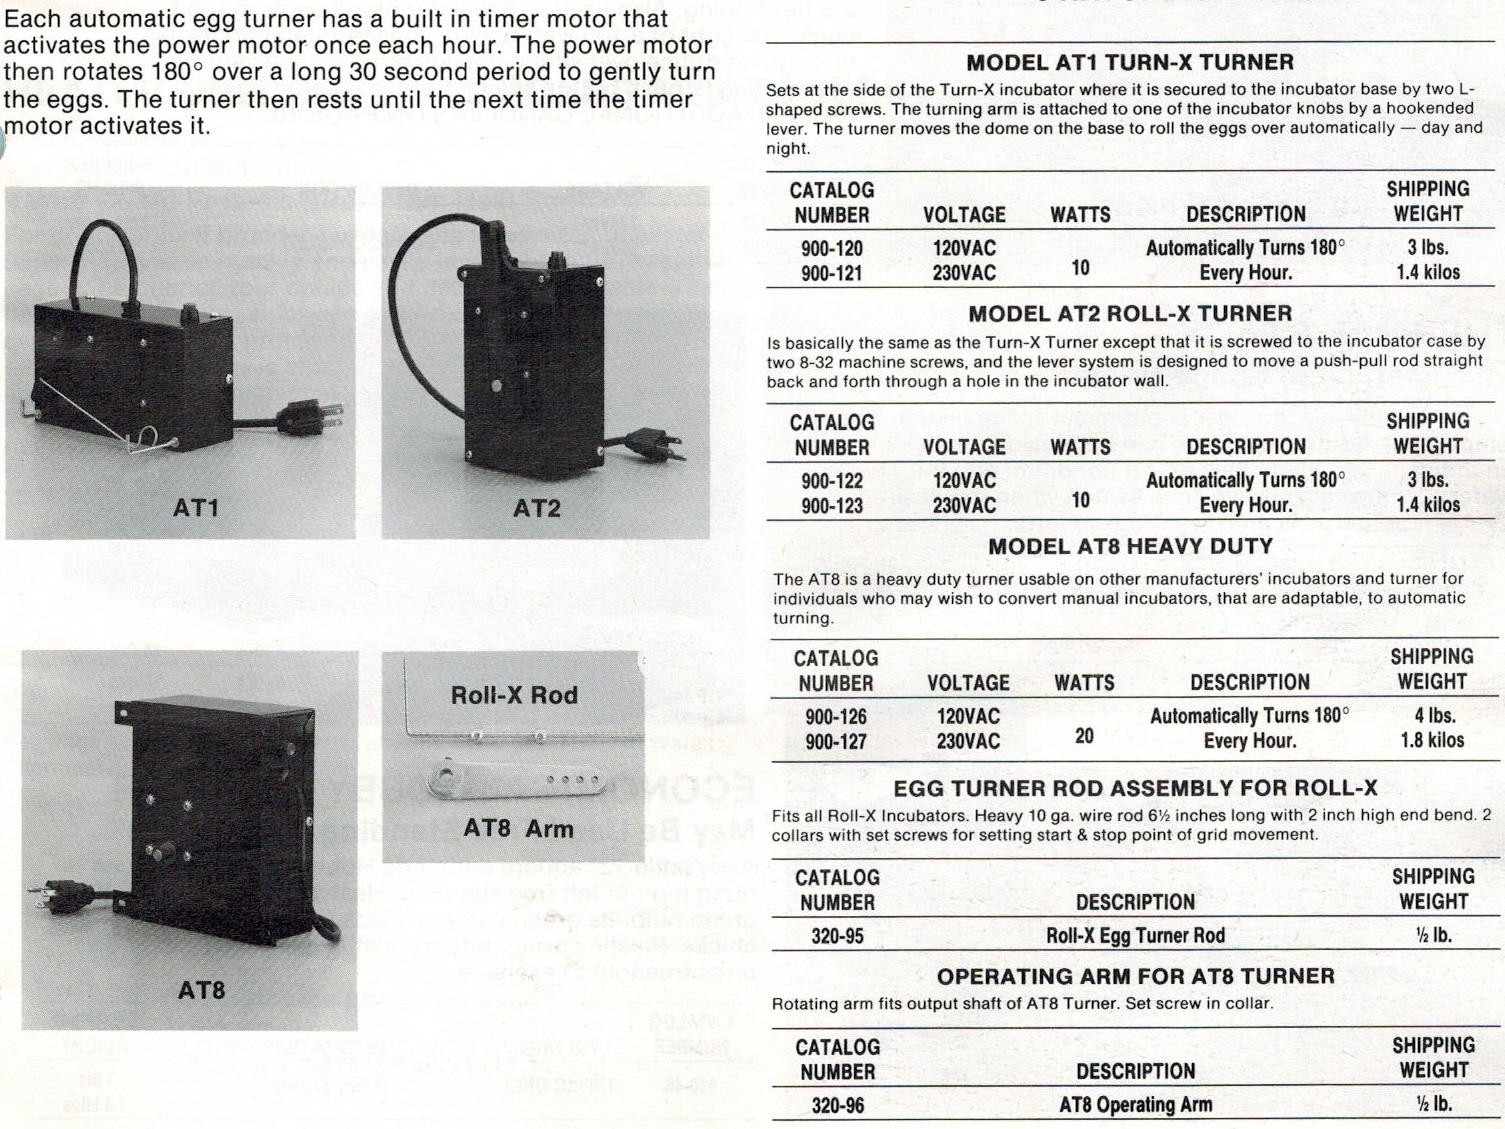
Lyon auto turner parts AT1, AT2 and AT8
Bellsouth 100 egg incubator – Hints and Tips
The ventilation of the Bellsouth 100 Standard is fixed. In most circumstances this is all that is required. However when operating the incubator in high humidity and high temperature situations, additional ventilation may be required for both temperature stability and humidity control.
The Bellsouth incubator comes standard with side ventilation holes that are filled with black control bungs.
Incubator temperature is the result of 3 factors
First is the outside air temperature.
Second is the heat of the elements.
Third is the heat generated by the eggs.
The incubator works by the heaters and eggs heating the air, which becomes lighter and rises, flowing through the side ventilation hole. This relies on the incoming air being cooler and so denser, and as it warms it expands and becomes lighter, so it rises, and leaves via the ventilation holes (if open).
If the outside air is very warm, then it does not expand much when it enters the incubator, so it does not rise so much.
In the last part of incubation, the eggs generate a lot of heat, and the function of the incubator is to remove the heat from the eggs. If the outside air temperature is too high the air flow through the incubator will be reduced and so the heat cannot be removed from the eggs.
At the same time the slower air flow means the humidity builds up as the moisture is also not being removed. Usually locations with high humidity are also warmer than ideal so it gets to be more difficult.
So when do we need extra ventilation?
1/ When the room temperature is above 28 degrees.
2/ When the humidity is higher than 70-80%.
How can you tell?
1/ If the temperature is creeping above 103F. The room temperature will usually be above 28 degrees Celcius.
2/ If the incubator has only one water channel with water, or no water channels with water and candling the egg shows the air cell is still too small. The room humidity will usually be high along with high room temperature.
Increase the ventilation by removing some of the bungs from the ventilation holes in the side of the incubator.
There is no substitute for good candling techniques which will tell you well in advance that you will need the extra ventilation.
Extra ventilation will not cure a problem hatch, but will prevent the problem developing, if the problem is detected early enough by good candling.
More
Drinker Manuals and Guides
Select the links below to view drinker manuals and guides.
BEC75 red hanging drinker
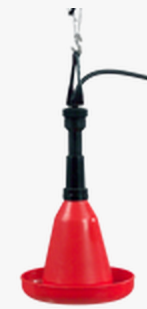
BEC75 drinker
BEC75_Drinker parts exploded view pdf
BEC75 Drinker Instructions pdf or
BEC75 Drinker on Bellsouth YouTube
MPR 6001 Water Pressure regulator
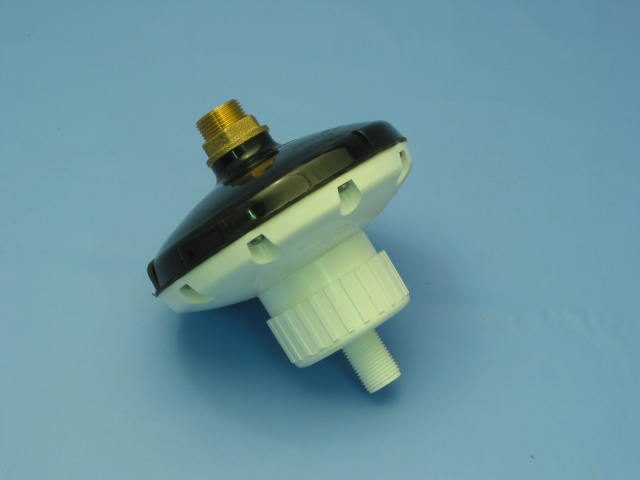
MPR 6001 – pressure regulator for drinkers
MPR 6001 Technical specifications pdf
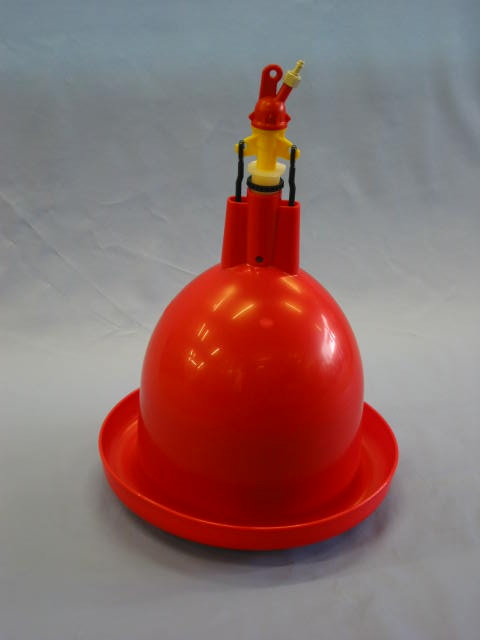
Plasson red bell hanging drinker
Plasson bell drinker
Gas Heaters
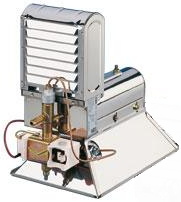
ZRFS SBM Gas brooder manual pdf
All SBM gas heaters require a matching SBM gas regulator, which allows control of the heat output within the range of 50% to 100%. This is because below 50% the efficiency of the radiant heat declines so that 30% gas consumption means less than 20% heat output. Said simply gas heaters are inefficient when the radiant temperature is too low.
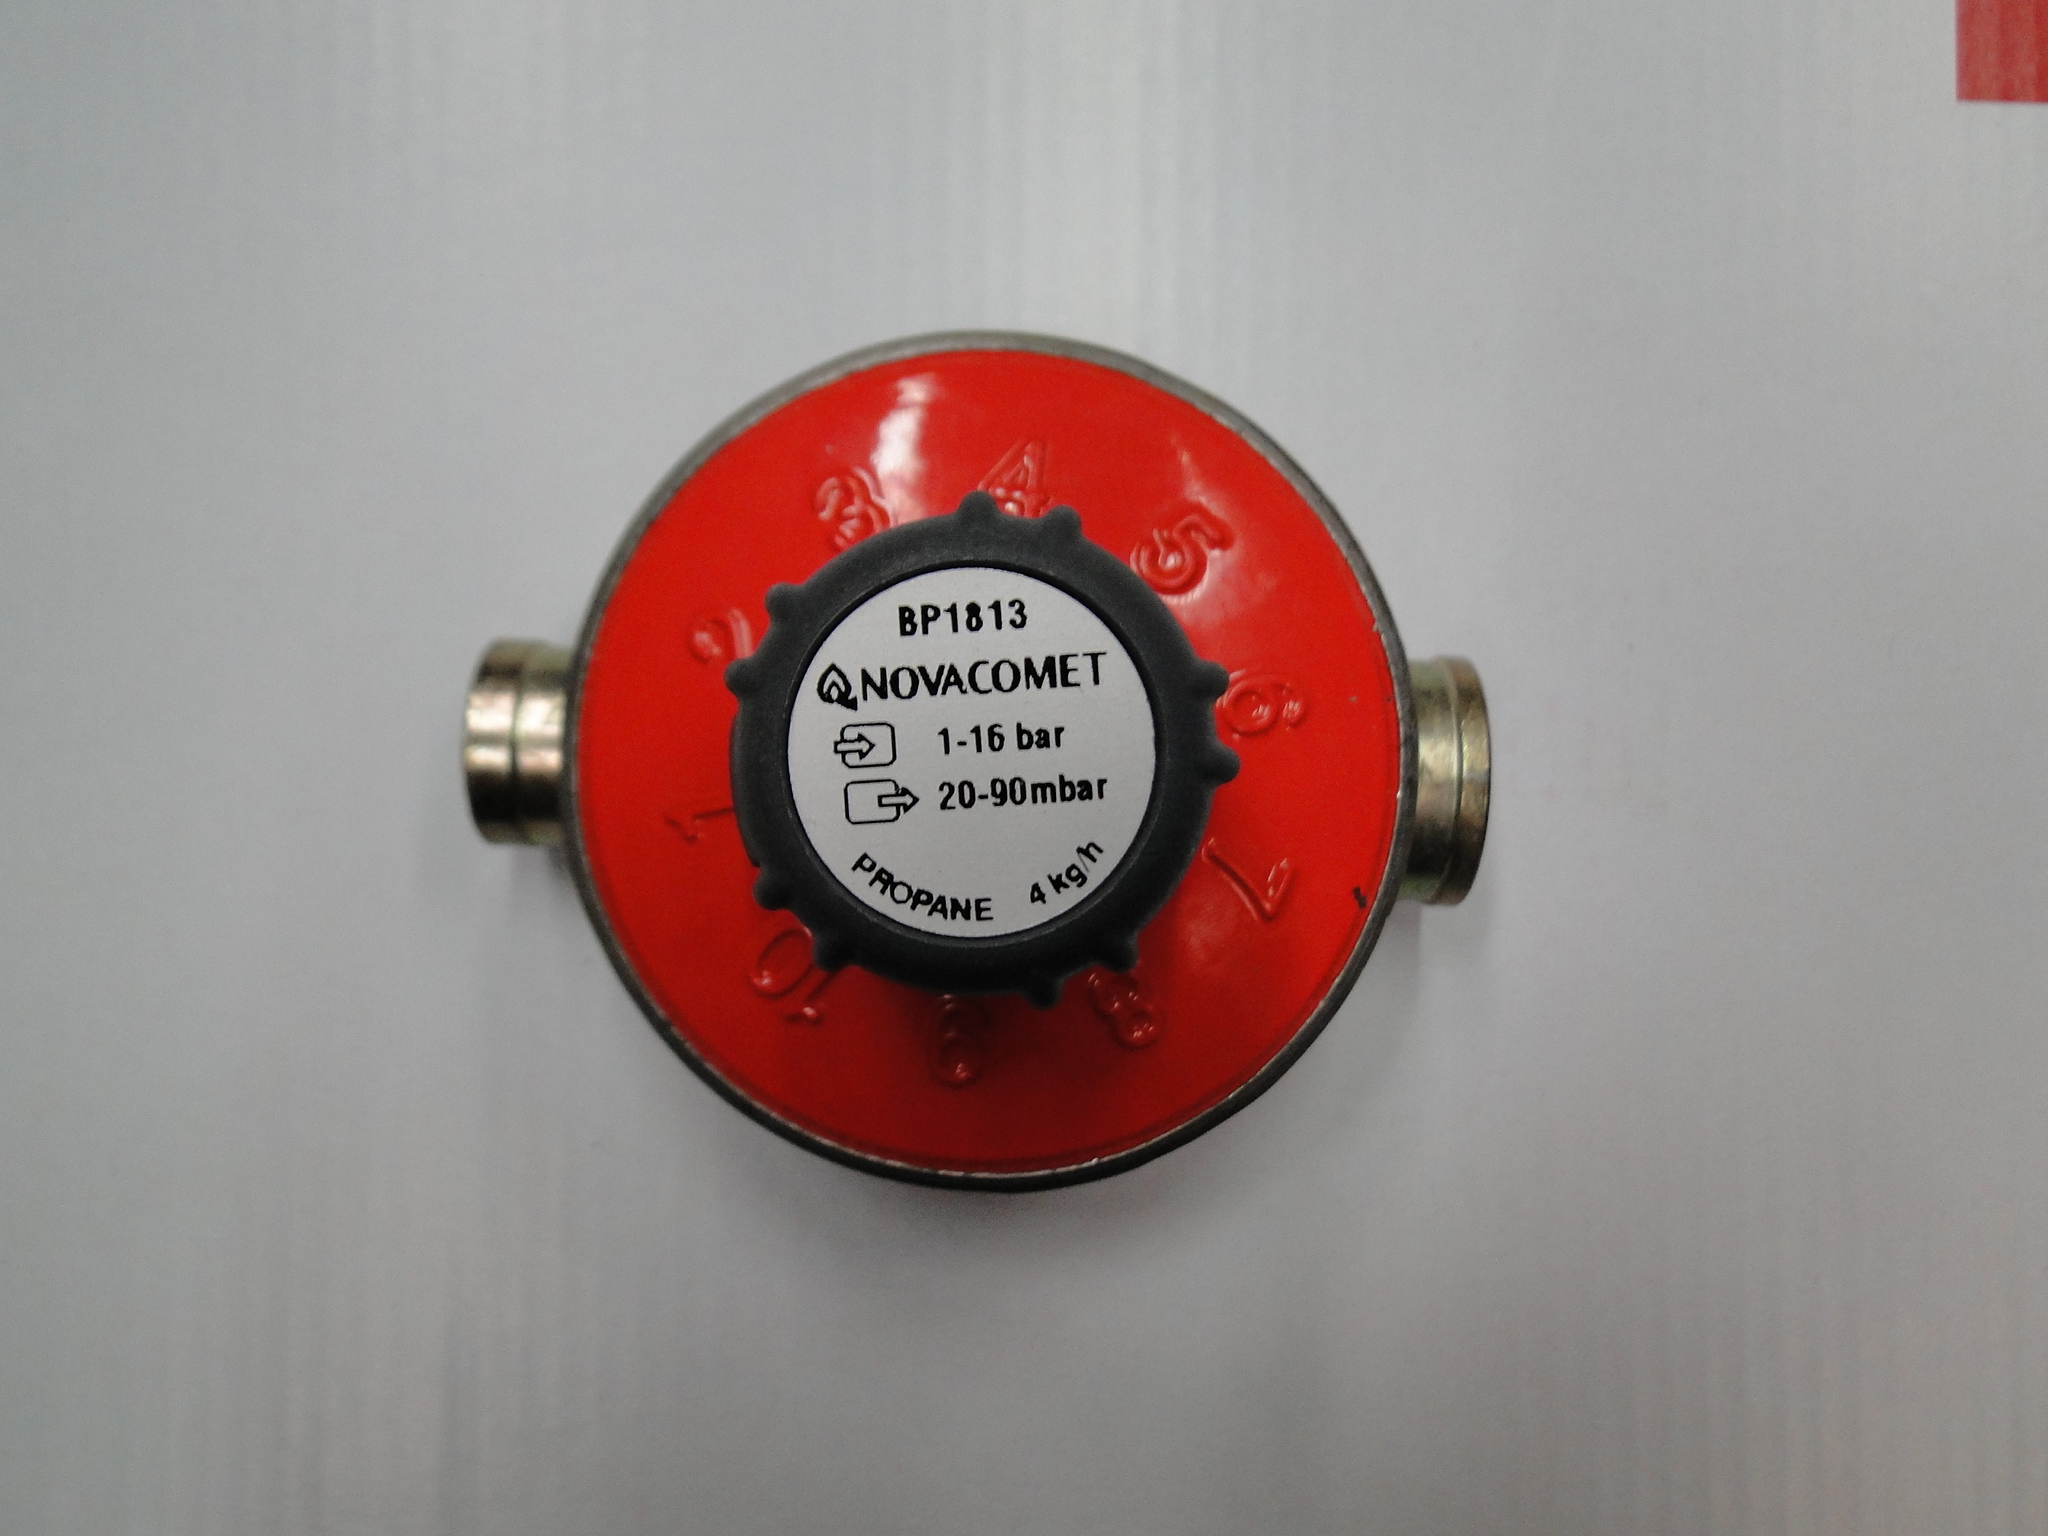
Regulators are available in 2 forms:
The REGPOL mounts directly on the standard gas bottle, and is ideal for small brooders with low gas consumption, and can be easily moved to different locations if required. It requires a gas fitter to comply with legal installation requirements.
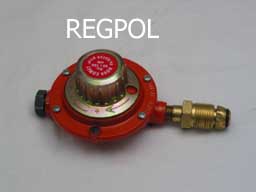
Regpol
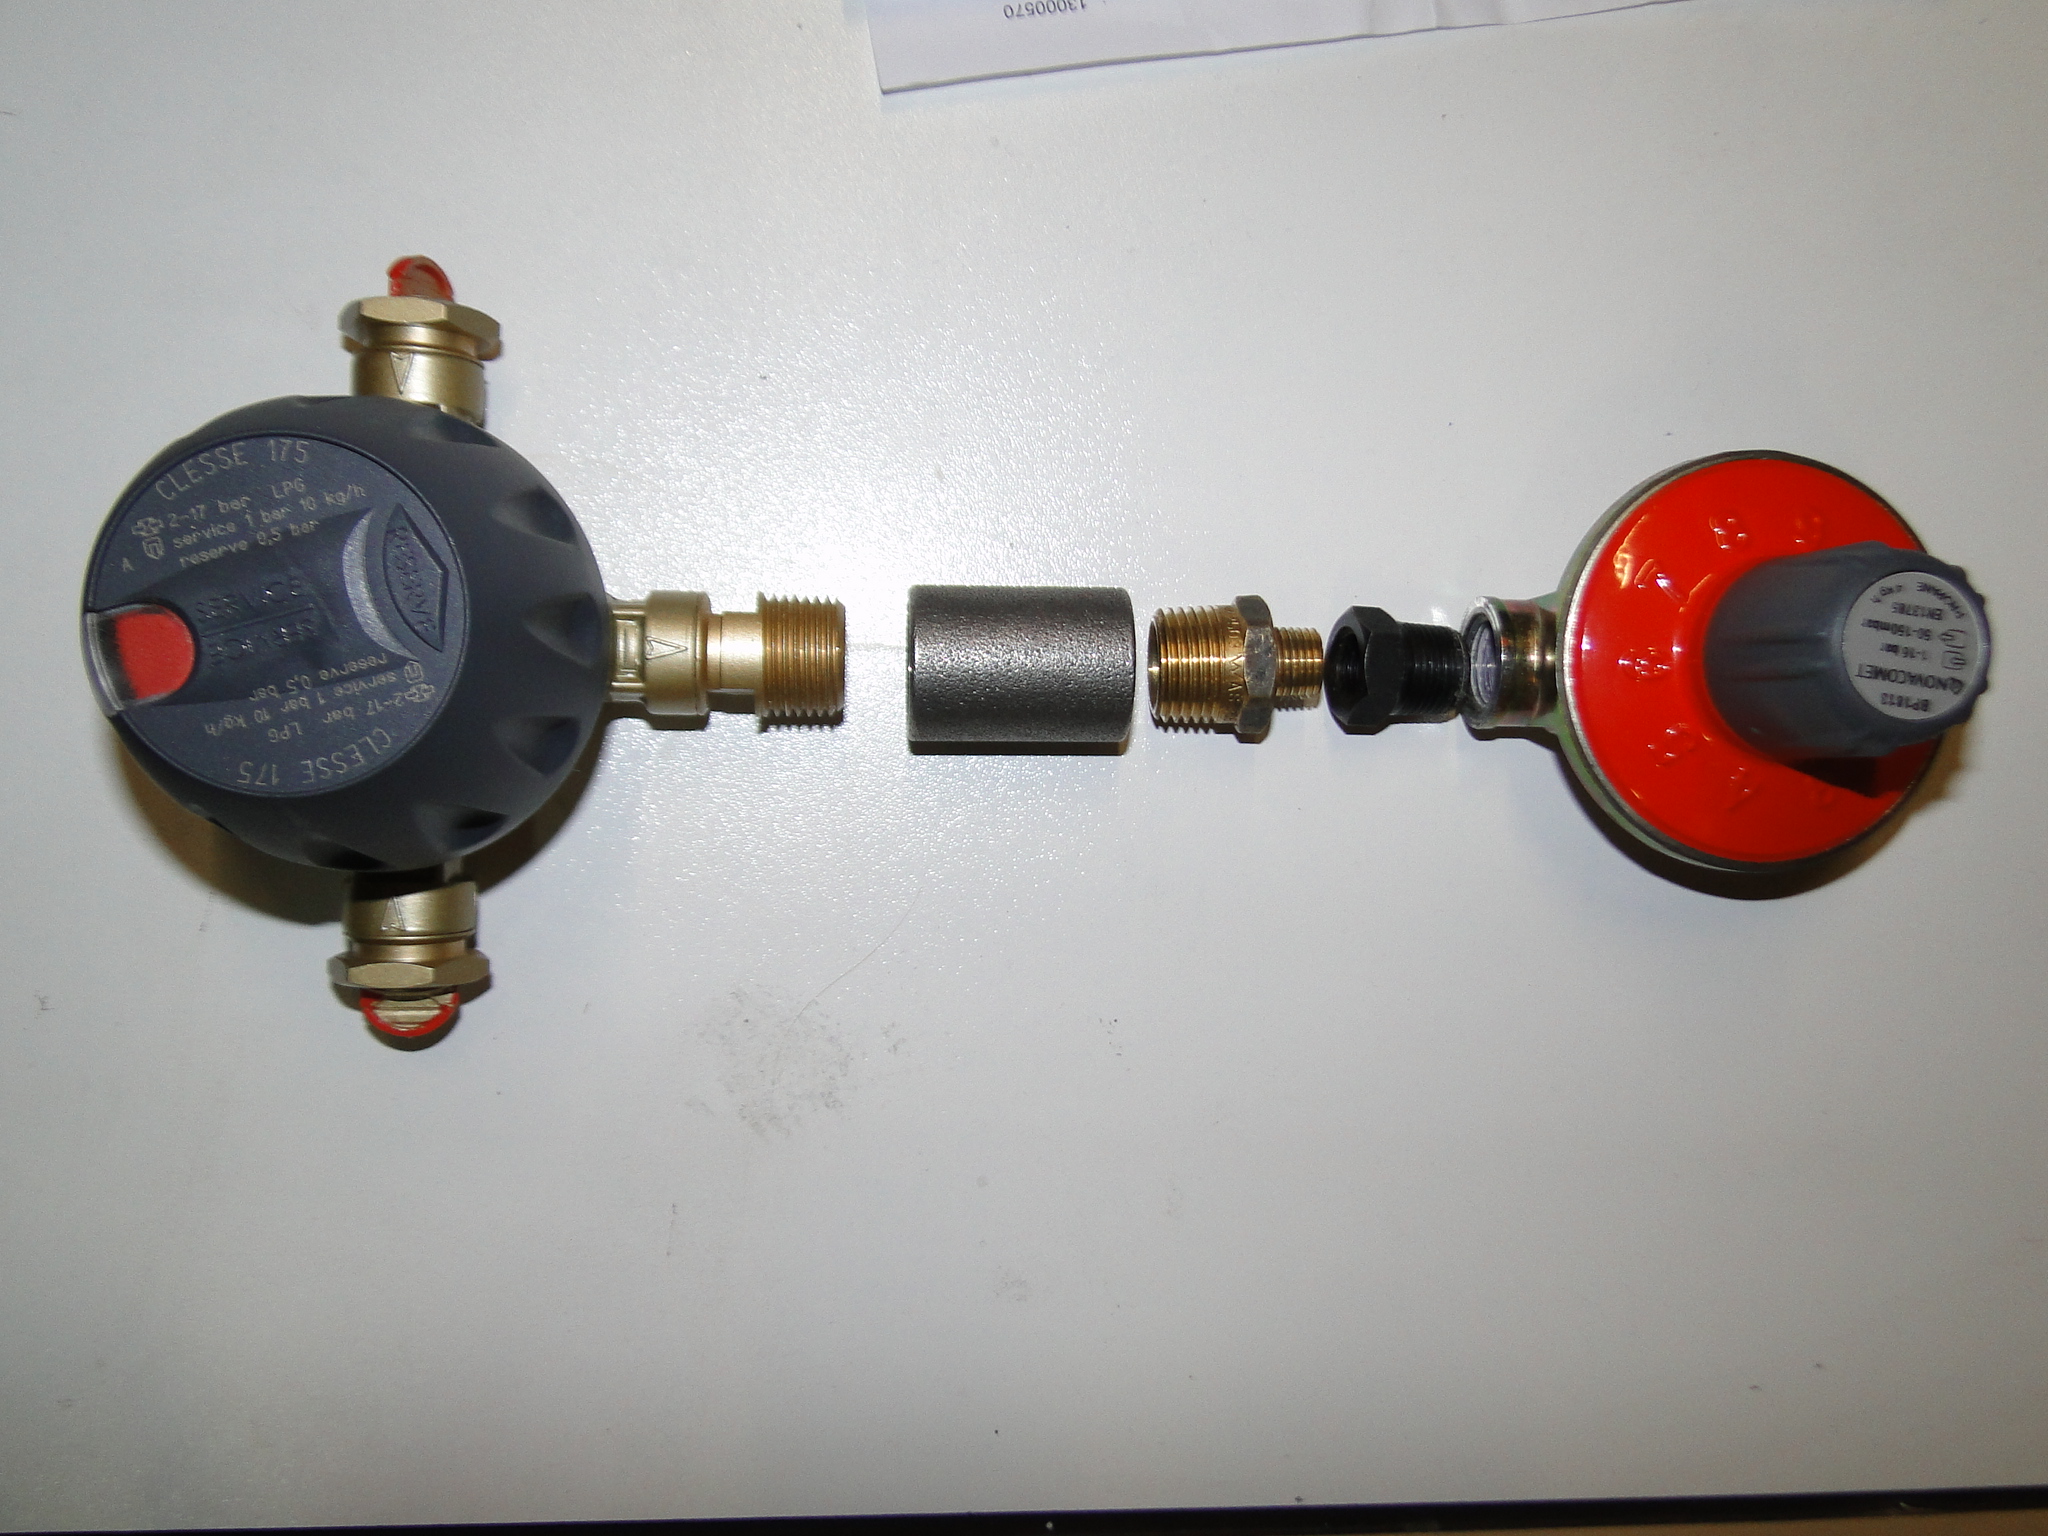
Inline regulator with auto-changer
General Gas Brooder tips
To set the heat for the chicks.
a/ Set the regulator to 7.
b/ Set at recommended height – see table
c/ Allow min 1 hour before placement of chicks.
d/ Place the chicks, allow 1 houre for the chicks to settle, then adjust the height of the head until the chicks spread evenly over the brooder area.
A gas fitter is recommended to comply with legal installation requirements.
Remember that the brooder should always be at approx 10 degree angle to the floor.
Also, see electric brooders
Fowl Pox Vaccinator parts pdf or
Fowlpox vaccinator maintenance on Bellsouth YouTube
NEC220 Poultry vaccinator parts manual pdf and on Bellsouth YouTube
NEC223 Pigeon vaccinator parts manual pdf and watch the NEC220 Bellsouth Youtube on disassembly and cleaning
Ben Nevis instruction manual (old) on Bellsouth Slideshare
Sanitouch parts (link will take you to an external website) catalogue
Rotomaid instruction manual pdf – Rotomaid Instructions
Avio colony nest rollaway on Avio Instructions
SKA 2 hole nest installation instructions slideshow
Hedipack egg stamper
Hedipack egg stamper_print version
Ink for Hedipack egg stampers, is water based ink for egg stamping with hedipack stampers. Ink lasts about 100,000 stamps. This depends upon a number of factors like size of stamp, logo, font characters and cleanliness of the egg, so this number is a guide only.
Before using your Hedipack egg stamper, clean the base of the head. The best way to do this is with a non-alcohol lotion tissue.
To refill Hedipack egg stamper, turn slightly on side (at a workable angle) and squeeze about 3ml of ink into flexhead, so it flows into sponge at base of egg stamper.
If there is ink showing on bottom sides of flexhead then there is too much ink. This may lead to excess ink flowing out through membrane. If excess ink is dropped into the egg stamper remove with eye dropper/teat pipette or turn the stamper upside down into a resealable container so the ink can be reused later.
FAQ
I have new heads but after a while there is a drop of ink on the underside.
There is too much ink in it. Refill when the print fades, this will solve the problem. The first prints are always bold.
Do the heads get clogged up with dirt coming in through the top?
No, indeed some dust will come into the head, but this will not enter the foam part.
How can I see that the head is worn out? The prints will get wider or there will
be small fine lines in the print.
Can I use a Flex system, when the eggs are manually packed? Yes, the
print will not be completely dried but you can safely hold and pack the printed eggs as normal. The stamp can only be removed by vigorous rubbing over the print. When inspecting the packed eggs you may notice the occasional stamp might be slightly smudged.
How can I remove the ink off my hands? Most ink can be removed by
normal soap.
It is warmer than 20° in the area. What should I do? You can continue printing, but the print will be wider and after stopping the print will become very wide..
All eggs are moist. Can I print?
No, moist eggs cannot be printed on.
Poultry Plucking Tips pdf_print version
Often plucking is regarded as a simple process, and if our birds are always the same age, weight, and breed then it’s easy. But for the hobbyist, it’s often not so easy, because of all these variables.
These notes are intended to assist in the development of the skills needed, without I hope, making it sound too complicated. It really is straight forward but a few principles always makes it easier.
There are four stages to good plucking.
1.) Select the bird at the right age
2.) Scald the bird correctly
3.) Pluck right way
4.) Treat the bird right after plucking.
1.) Selecting the bird at the right age is important. The birds develop several sets of feathers as they grow. The early stage of these feathers as they just emerge is called pin feather stage. Plucking birds with pin feathers is always much more difficult, so I recommend selecting the birds after pin feathers have unfurled. So check the birds and if they have pin feathers wait another week and usually they are unfurled and will pluck without lots of manual clean up afterwards. Very old birds and very young birds often have skin which is thinner and less resilient to the plucking process, which is more prone to tearing. These birds need more careful scalding and attention during plucking to avoid skin tears. Please note: with ducks it is sometimes impossible to pick a time when there is no pin feathers so wax dipping after plucking is used to remove the pin feathers
2.) Scalding is the process of dipping the birds in hot water to cause the release of feathers, the combination of time and temperature are important. The difference methods are called hard scald and soft scald. If the birds are for immediate consumption, then hard scalding at higher temperatures and for short times is acceptable. This is usually done at 60-65 degrees for just enough time for the leg feathers to come off when rubbed with the thumb. This combination can cause some blotchiness of the skin, not so pretty with roasting birds and also the high temperatures tend to reduce shelf life. Soft scalds is usually at 45-55 degrees and is less likely to damage the skin but takes longer to reach the point where the feather release under a little rub with the thumb. If you want to fridge them for a week then better to soft scald. Record the time and temperature for each combination of breed and age you use so that it is easy to repeat next time.
3.) Plucking. Good plucking is a combination of the right number of birds, the right time of plucking and the right removal of feathers. The bird in the plucker should tumble in such a way that it is tumbling end over end but sideways at the same time, a sort of rotating diagonal tumble. This means all sides of the bird pluck evenly. If you have too many birds in the plucker they cease to rotate correctly and slide around plucking one side and leaving the rest poorly plucked. Add extra birds with each plucking batch and when they cease to rotate you can make a note, to only pluck one or two less of that breed, age and weight combination. You may need to remove wing flight and tail feathers before plucking, usually it’s possible to pull them one handful for the tail and one handful each wing. Plucking time is an observation, and will vary according to the type of bird and feather cover. Over plucking, can damage the skin. Feather removal is by cold water spray. Use a trigger gun on a hose, and as soon as the feathers build up in the machine, usually about 20 seconds into plucking, flush with a good flow of water so the feathers all wash out the side. This allows better plucking and a cleaner finish. It also starts to chill the bird.
4.) Chill the bird in cold or iced water as quickly as possible. This will give better carcass life and nicer presentation. Eviscerate the birds after initial chill and refrigerate as quickly as possible.
Newsletter_ March 1988 print version
Harking back to 1988, this Bellsouth Newsletter has an article on the Art of Poultry Photography. Enjoy!